Dashboard Guide
The dashboard at powermemory.ai is where you manage your vault — browse, add, edit, export, secure it, and get connection instructions for your AI tools.
Overview
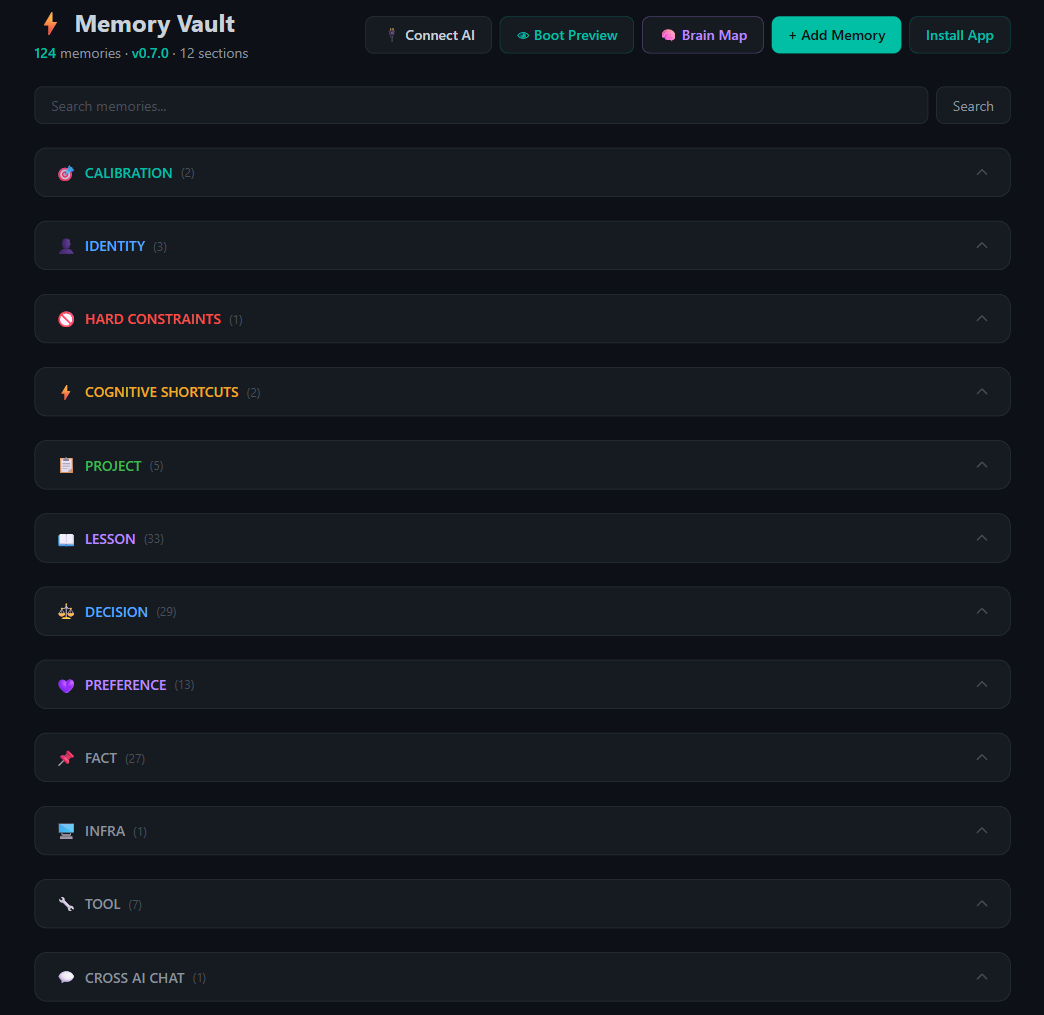
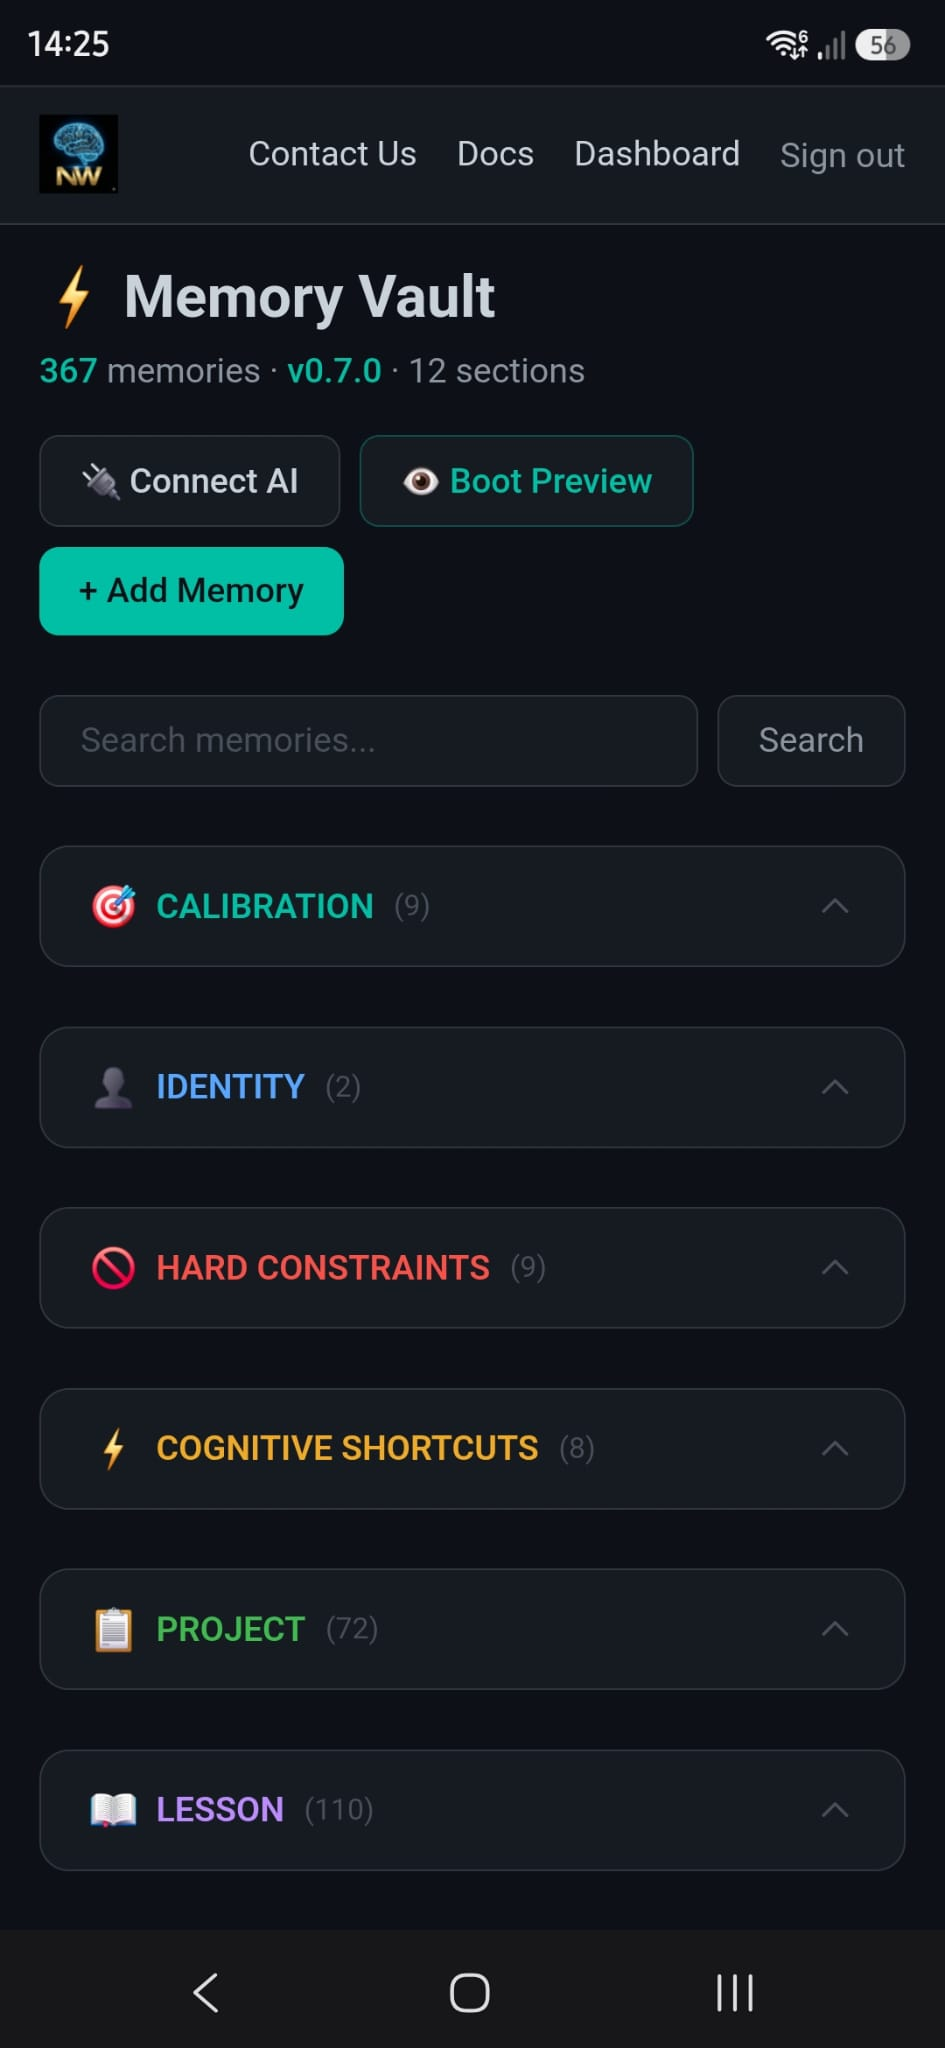
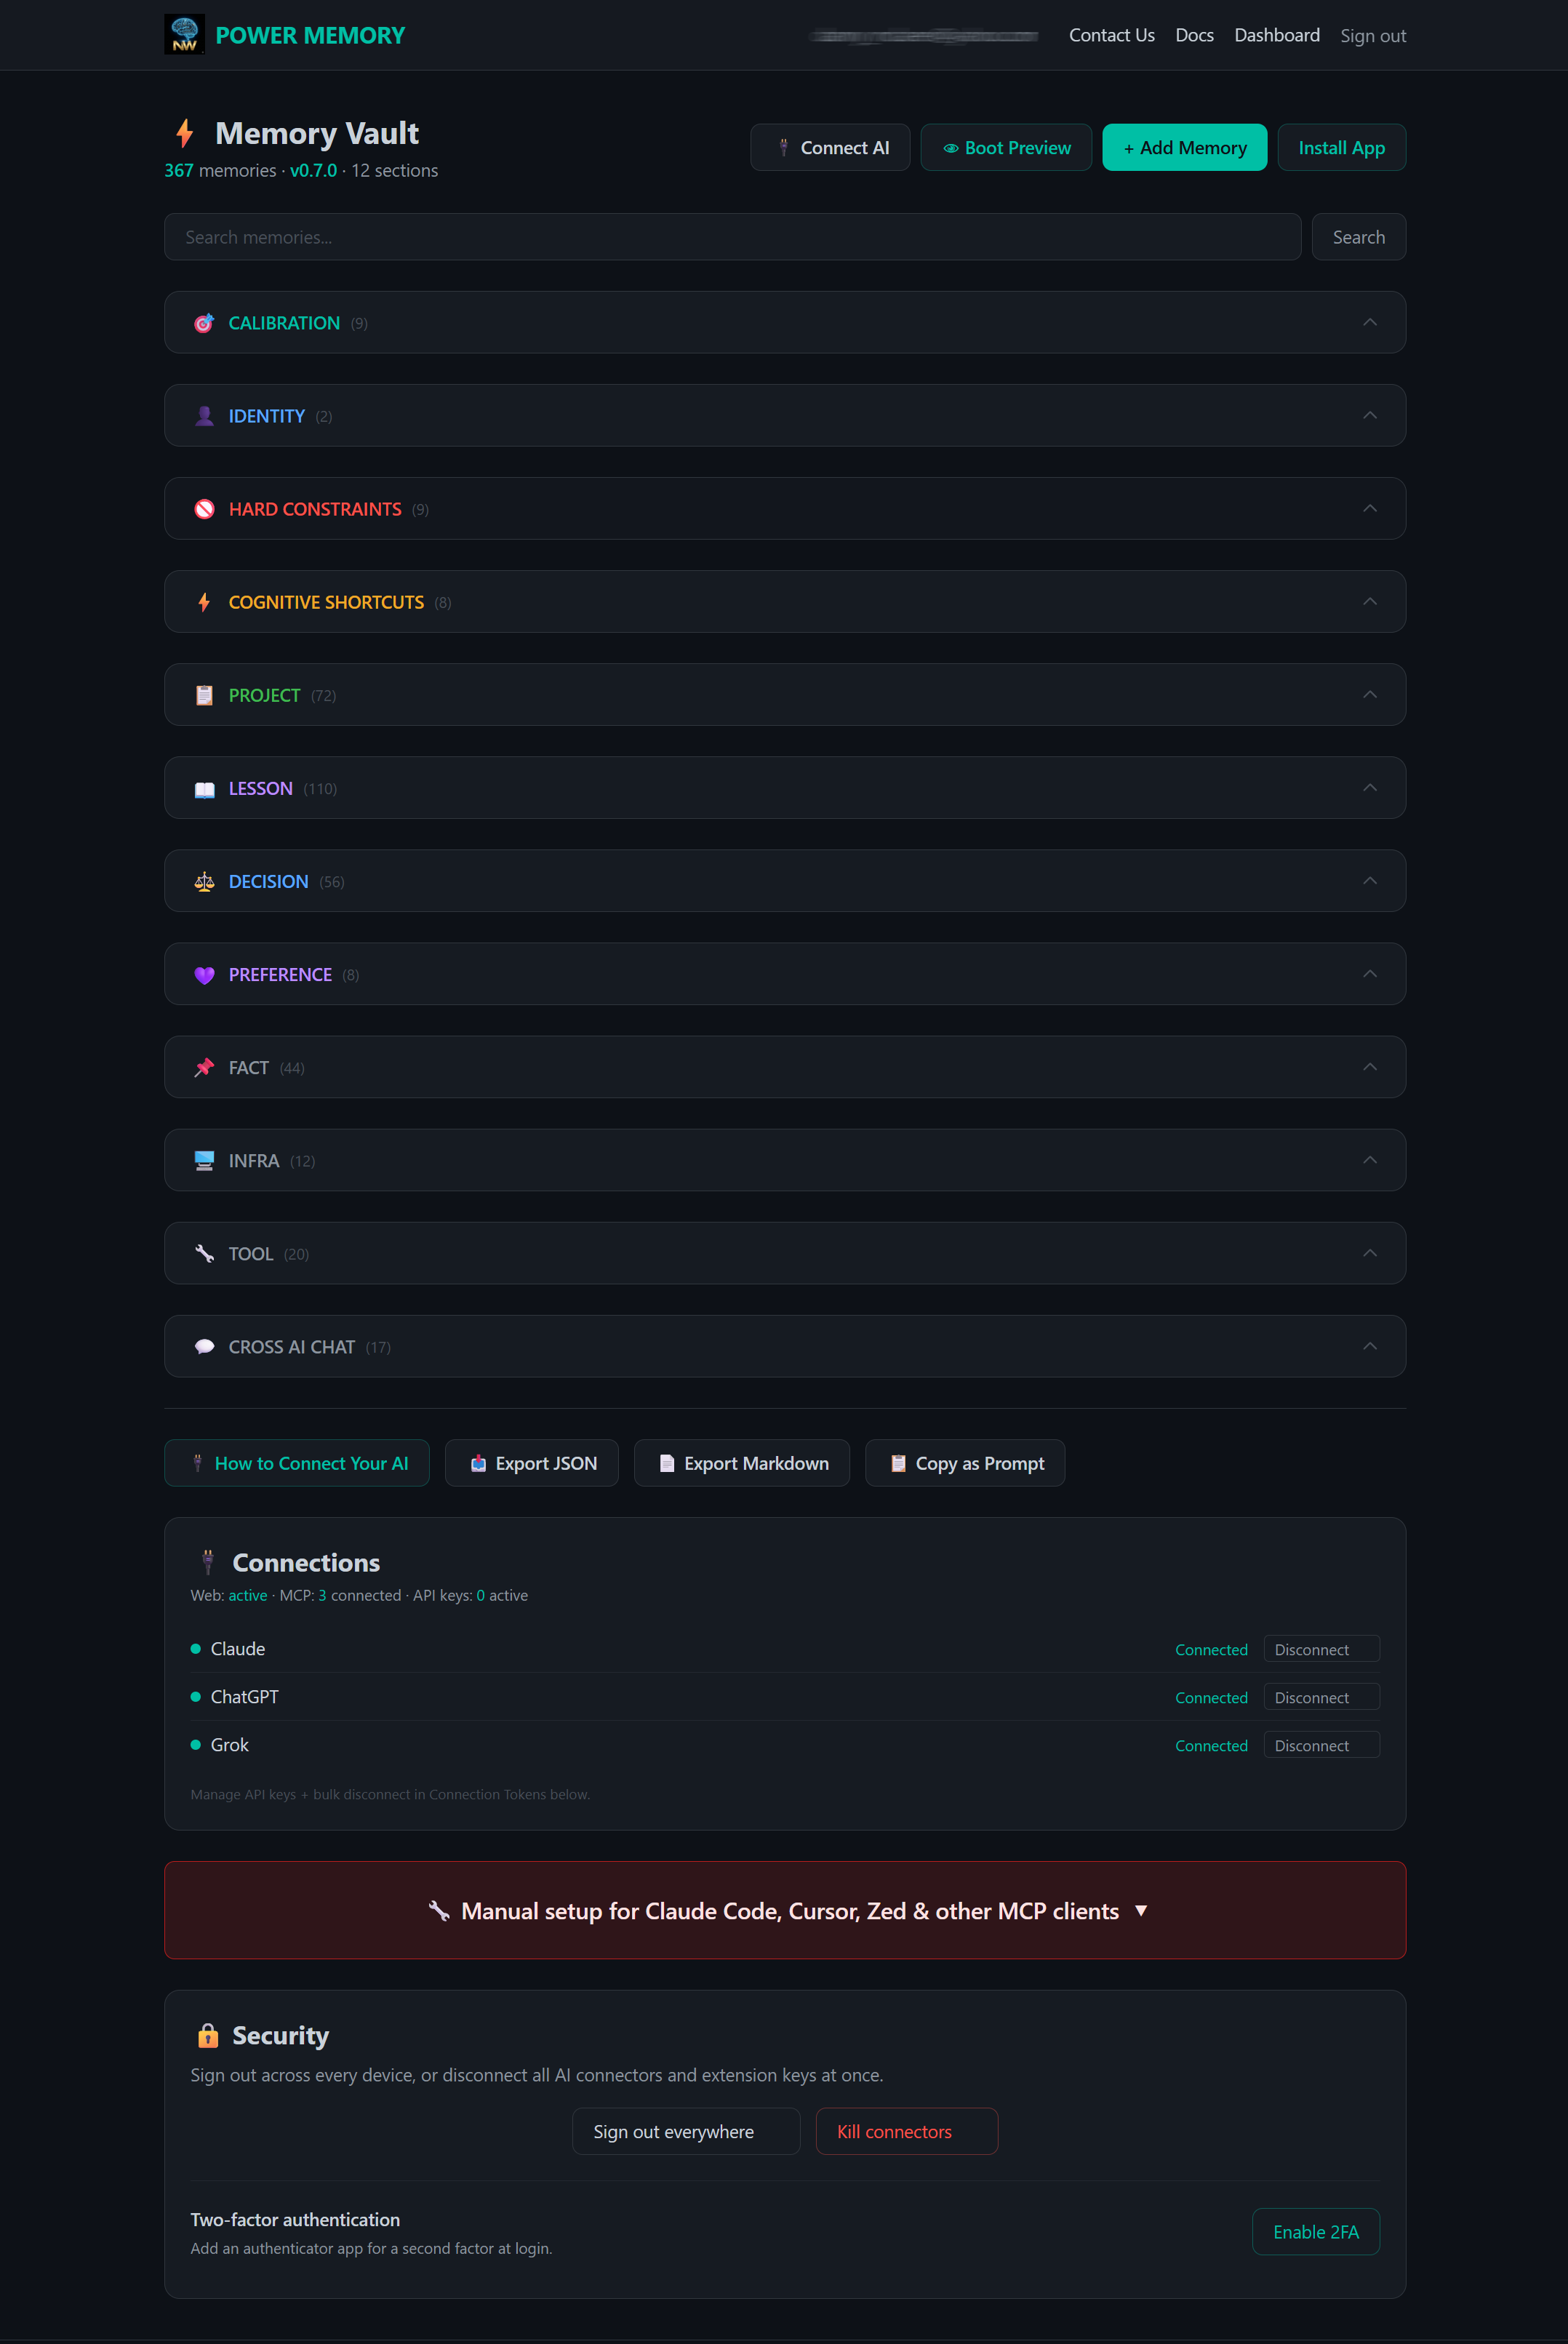
When you sign in, the dashboard shows your memories grouped by category, each with a live count (the header shows your totals — e.g. 124 memories · v0.7.0 · 12 sections). Along the top are quick actions: Connect AI, Boot Preview, + Add Memory, and Install App. Below your vault you'll find Connections (live status of your AI connectors), Security controls, and export tools. New accounts also see a short setup stepper (Vault created → Connect AI → Ready) that disappears once you've connected and saved your first memory, or via its dismiss ✕.
First sign-in: the Service Notice
The first time you sign in, PowerMemory shows a one-time Service Notice. Read it, tick the checkbox, and click Accept and continue — you won't be asked again unless the notice materially changes. If you decline, you are signed out: your account and data stay untouched, and you can still export your data or exercise your data-protection rights without accepting. AI connectors set up before the notice keep working for a 14-day grace window; after that they pause until you sign in and accept.
Add a memory
Click + Add Memory to open the New Memory form. Type what the AI should remember, pick a Category and a Priority (P0–P3), and optionally tick This is a constraint (NEVER do this) to store it as a hard rule. Save, and it lands in the matching category.
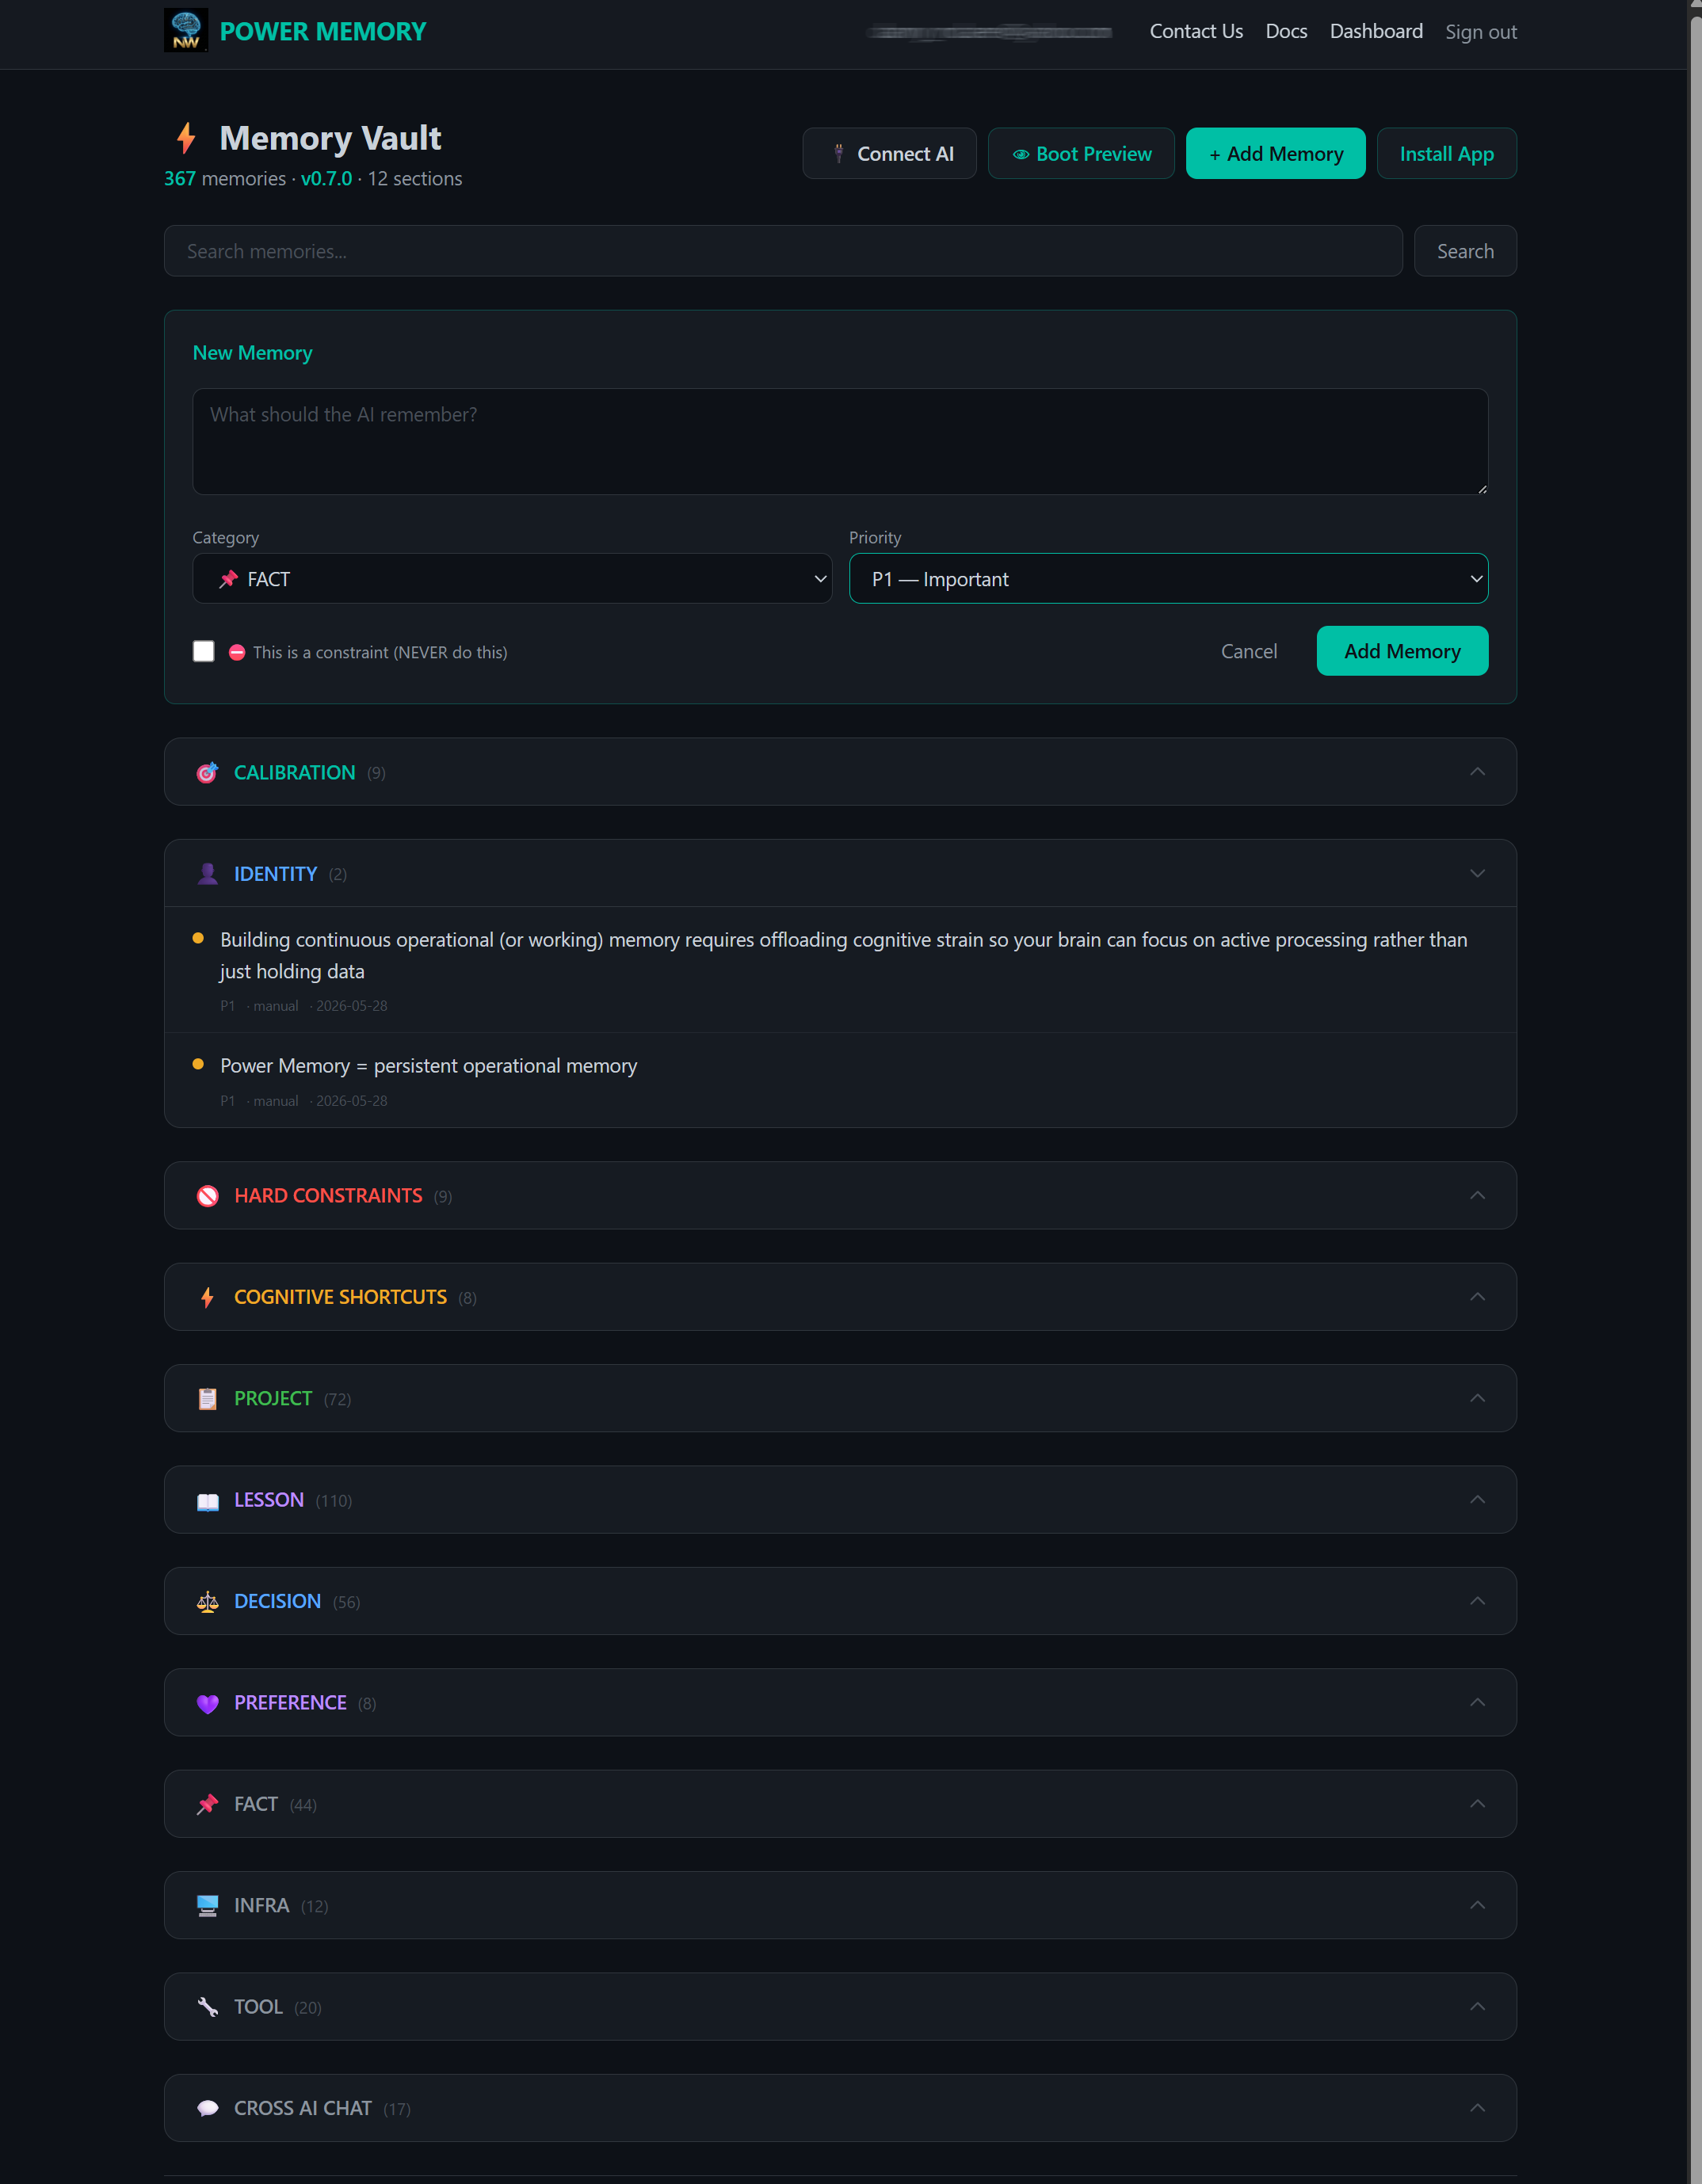
Browse memories by category
Click any category to expand it and see the memories inside. Each memory shows its content, priority, source, and date. The vault is grouped into twelve sections — from Calibration, Identity, and Hard Constraints through Project, Lesson, Decision, and Cross AI Chat.
Use this view to review what your AI has saved and keep your vault signal-rich. Not sure what belongs where? See Memory Categories.
Brain Map
The Brain Map is a visual view of your whole vault. To open it, click 🧠 Brain Map on your dashboard.

It organizes and explains the relationships between your memories — drawn from the words and structure they share. It doesn't think or understand; it shows you what connects to what.

What you're looking at
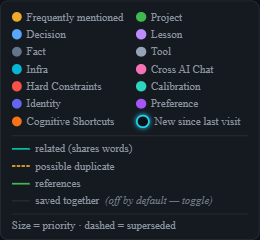
Each dot is a memory, coloured by category and sized by priority — a bigger dot is higher priority, and a dashed outline marks a superseded memory. A yellow diamond is a frequently mentioned topic: a name or phrase that comes up across many of your memories. It's a usage signal, not a verified project.
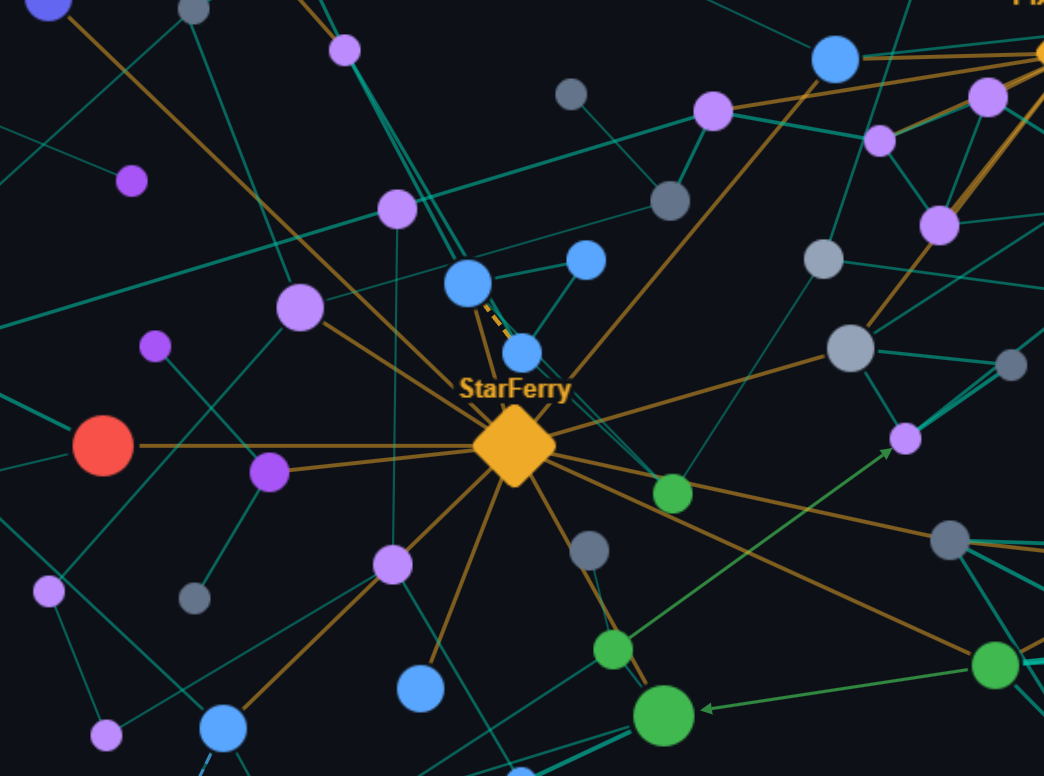
The lines between memories are the relationships PowerMemory found:
- Teal line — related: the two memories share distinctive words.
- Amber dashed — a possible duplicate.
- Green line — one memory references another.
- Faint line — saved together in the same minute (off by default — toggle Saved together to show it).
The full key lives in the Legend card, bottom-left.
Explore your vault
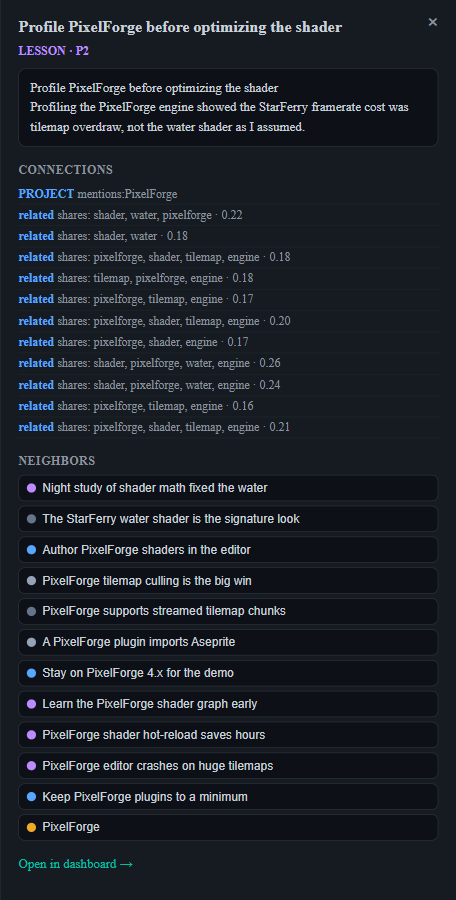
Click any dot to open its panel — the memory's content, its connections (each related link shows the words the two memories share and a match score), its neighbours, and a link to open it in your dashboard.
Search highlights a memory by its title and dims everything else, so the match stands out.

Filter by ticking a category (or a priority) to narrow the map to just those memories; the hubs stay so you keep your bearings.
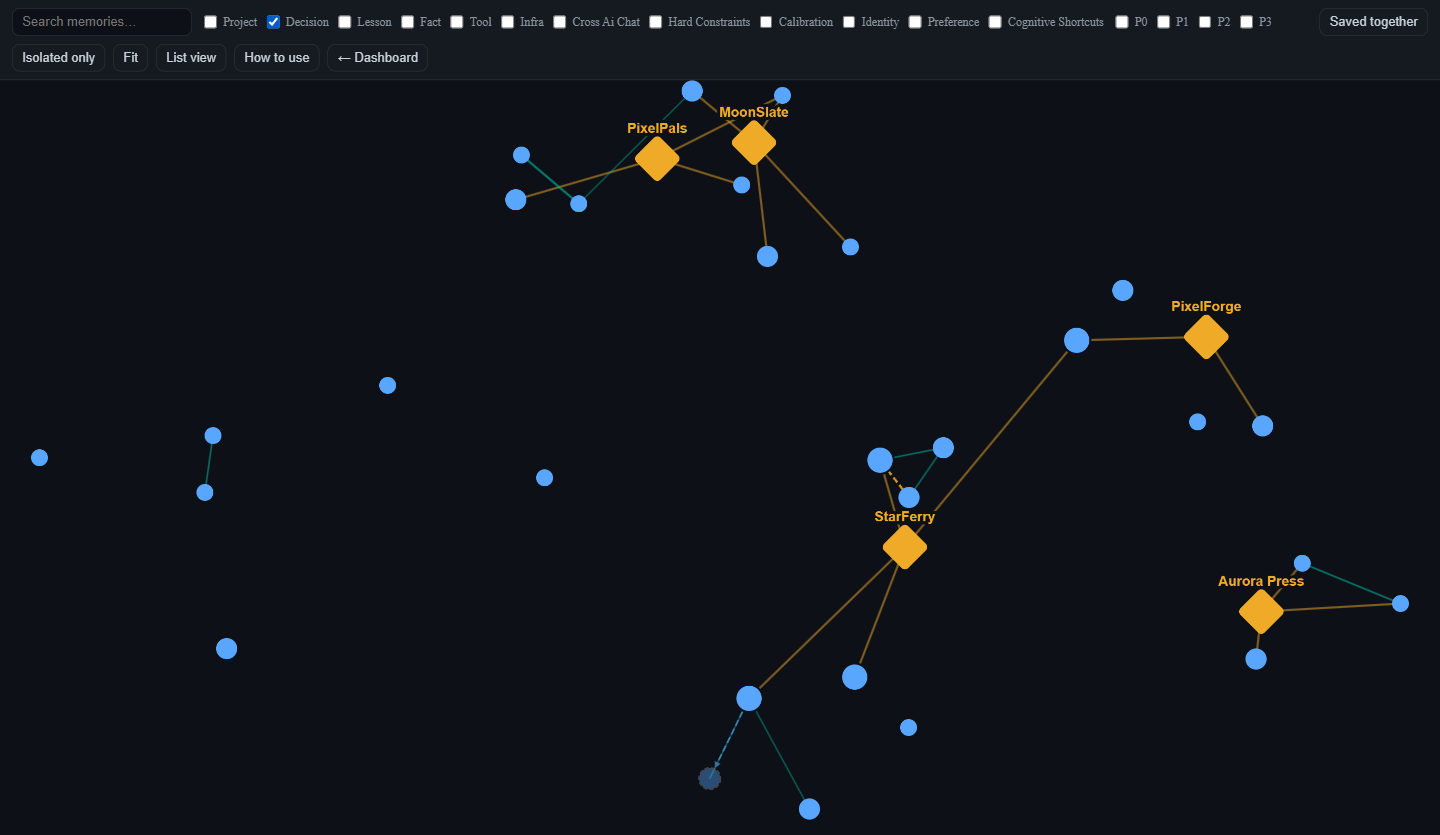
Use Fit to recentre, Saved together and Isolated only to change what's shown, and List view for an accessible, text-only version of the same vault.
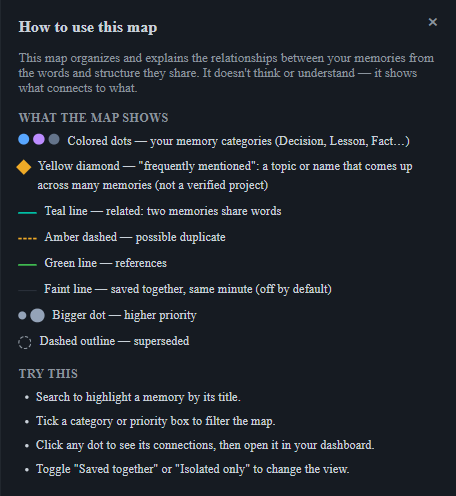
New to the map? Open How to use
The How to use button in the toolbar opens a short, visual guide — the same dots, lines, and actions explained right beside the map.
On a phone the toolbar and legend collapse so the map gets the screen — tap Filters or Legend to expand them.

Private and read-only
The Brain Map is built fresh from your own vault each time you open it — it adds nothing and changes nothing. Like the rest of the dashboard, it sits behind your login.
Edit and delete
From the dashboard you can:
- Edit a memory's content, category, or priority.
- Delete individual memories you no longer need.
Adjusting priority (P0–P3) changes what surfaces first when you inject context.
Export your vault
Your data is portable. Three options:
- Export JSON — structured backup, ideal for re-import or processing.
- Export Markdown — human-readable copy of your whole vault.
- Copy as Prompt — copies your memory as a ready-to-paste block for any AI chat.
You can export anytime — your vault is never locked in.
Connections
The Connections card shows the live status of each AI connector with a colored indicator: 🟢 green = Connected (an active MCP token exists), ⚫ grey = Not connected. It covers the three MCP platforms — Claude, ChatGPT, and Grok — plus a one-line summary of your web session, MCP connectors, and active API keys. Each connected AI has a Disconnect button to revoke just that one connector (it will need to reconnect to reach your vault).
The How to Connect Your AI button gives you the setup steps and your MCP endpoint, with a manual section for Claude Code, Cursor, Zed, and other MCP clients. For full walkthroughs, see MCP Connectors (Claude / ChatGPT / Grok) and the Chrome Extension (Gemini / Copilot / Perplexity).
Note: the Connections card shows MCP connectors only (Claude/ChatGPT/Grok). Gemini, Copilot, and Perplexity connect through the Chrome extension and are managed there, not in this card.
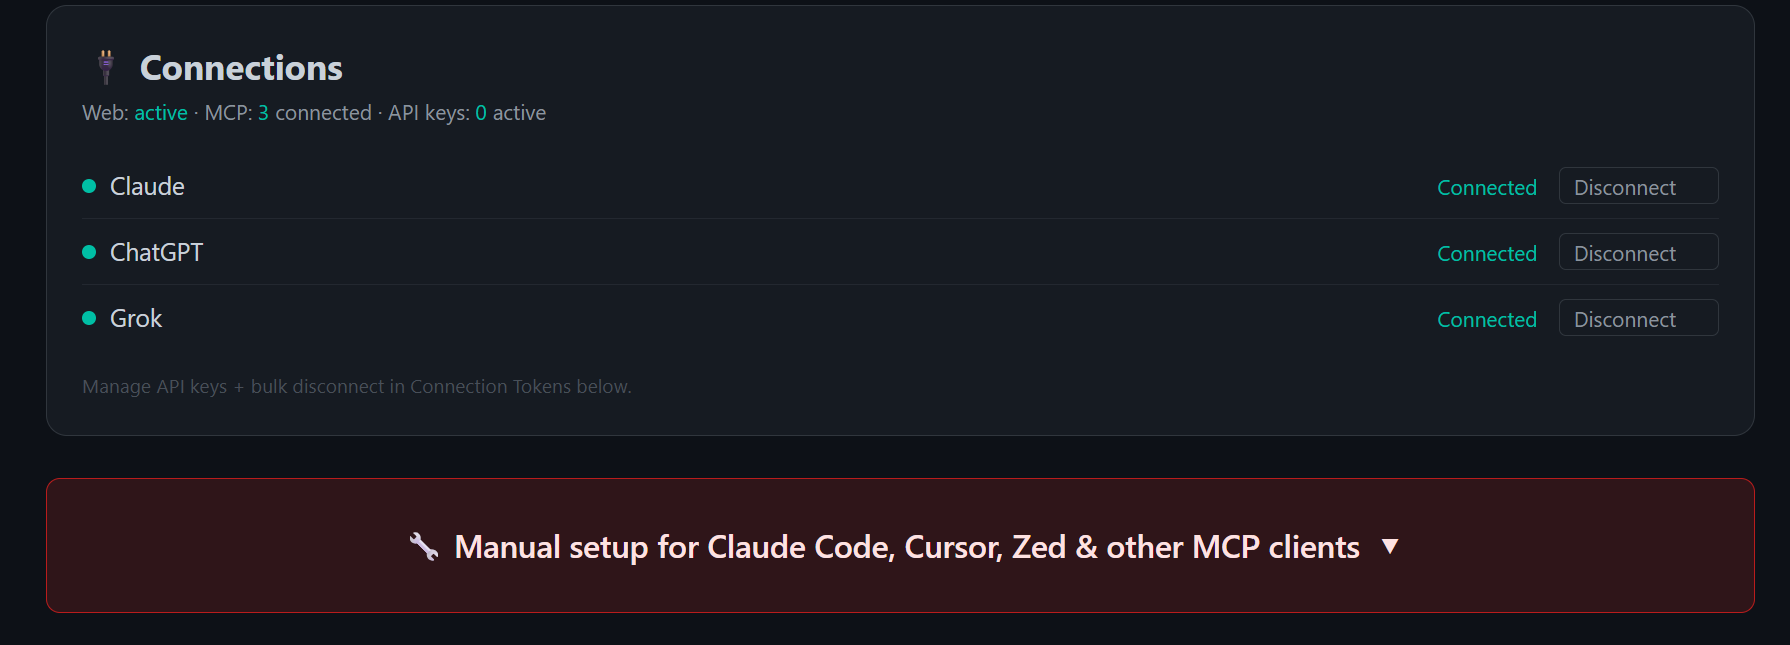
Below the Connections card, the dashboard also shows a standalone Manual setup for Claude Code, Cursor, Zed & other MCP clients banner — expand it for copy-paste configuration for those tools.
Install as an app
PowerMemory is a progressive web app (PWA). Click Install App on the dashboard to add it to your device — it then opens from your home screen or app launcher like a native app, full-screen and one tap away.
![]()
Security
The Security card groups your account-wide protections.
Account controls
- Sign out everywhere — signs you out on all devices and browsers at once (you'll need to log in again). Per-device sign-out stays in the top nav.
- Kill connectors — revokes all AI connectors (Claude/ChatGPT/Grok) and Chrome-extension keys in one action. Your web session stays active (use Sign out everywhere for that). Use it if a device is lost or for a clean reset; each AI must reconnect afterward.
Two layers, two controls
Sign out everywhere ends your web sessions. Kill connectors revokes the API/MCP tokens your AI tools use. They're independent — 2FA below protects web login, while your connectors are secured by their own revocable tokens.
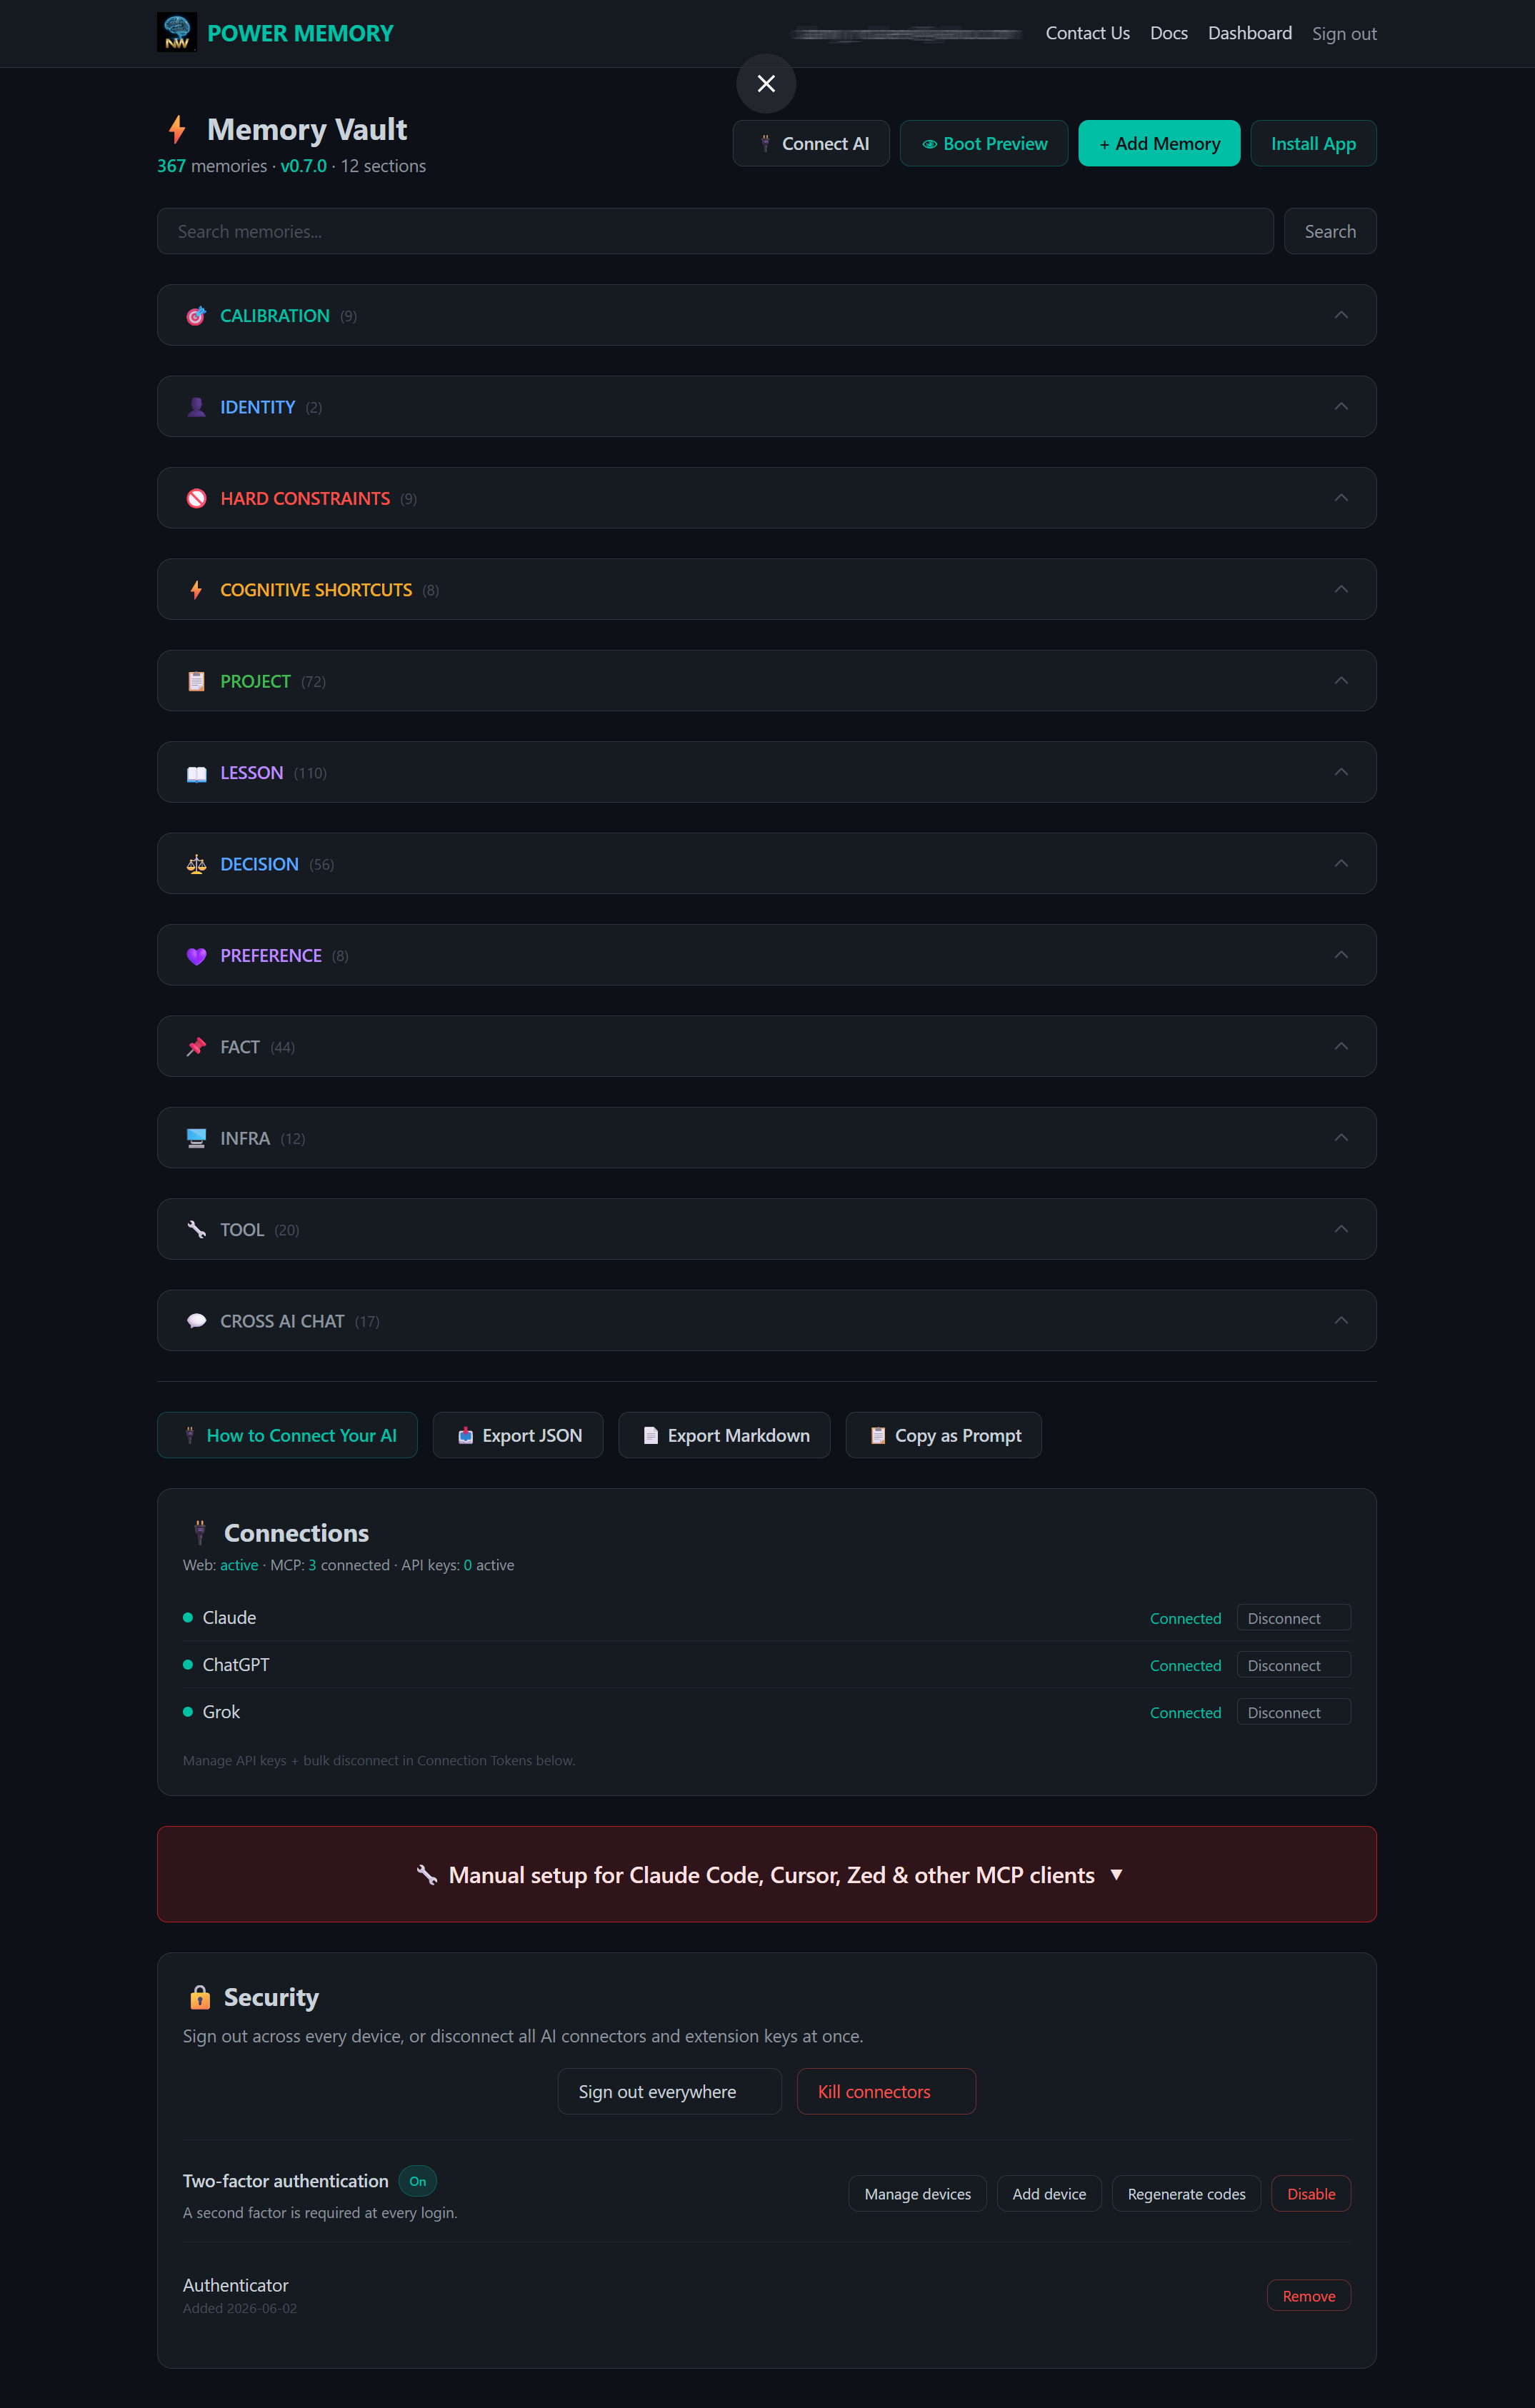
Two-factor authentication (2FA)
Add a second factor to your web login with any authenticator app (Google Authenticator, 1Password, etc.). When 2FA is on, every login asks for a 6-digit code after your magic link — so an email alone can't reach your vault.
Setting it up:
- Click Enable 2FA, then scan the QR with your authenticator app (or type the manual key) and enter the 6-digit code to verify.
- Save your backup codes. Each works once and is shown only this once — Copy or Download them and store them somewhere safe. Confirm the acknowledgments, then Activate two-factor.

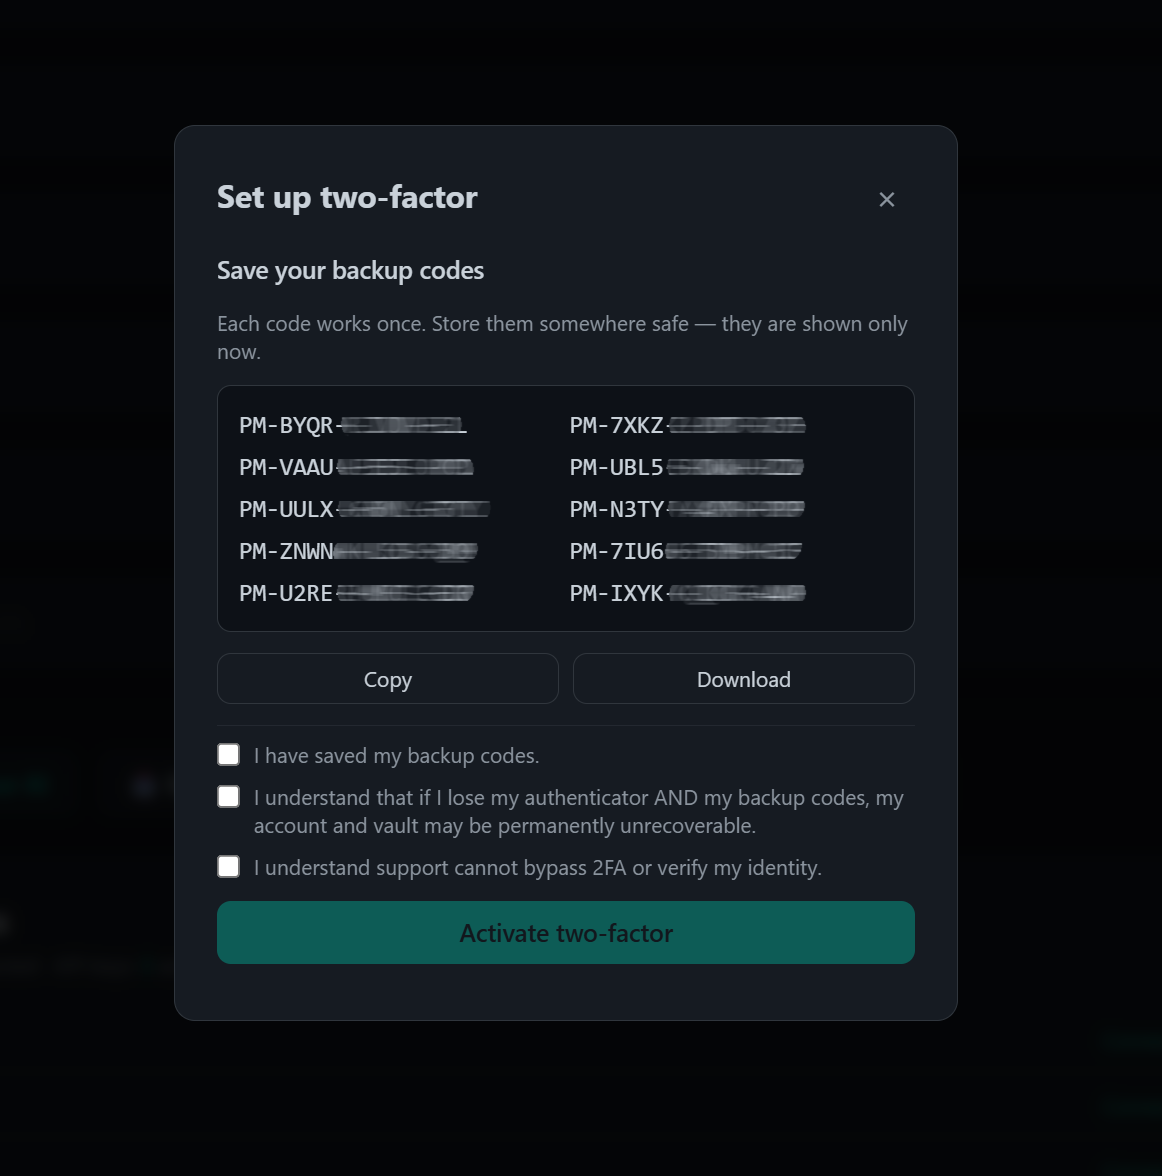
There is no recovery without your codes
If you lose both your authenticator and your backup codes, your account and vault may be permanently unrecoverable. Support cannot bypass 2FA or verify your identity. Keep your backup codes somewhere safe, and consider adding a second device.
Managing 2FA (once enabled):
- Manage devices — view your authenticators and remove one you no longer use.
- Add device — enroll another authenticator (up to five) so a lost device won't lock you out.
- Regenerate codes — issue a fresh set of backup codes (the old set stops working).
- Disable — turn 2FA off. Each of these asks for a current code (or a backup code) first.
2FA covers web login only
Two-factor protects signing in on the website. Your API keys and MCP/OAuth connectors keep working on their own tokens — manage those from the Connections card and Kill connectors.
Danger zone — delete your account
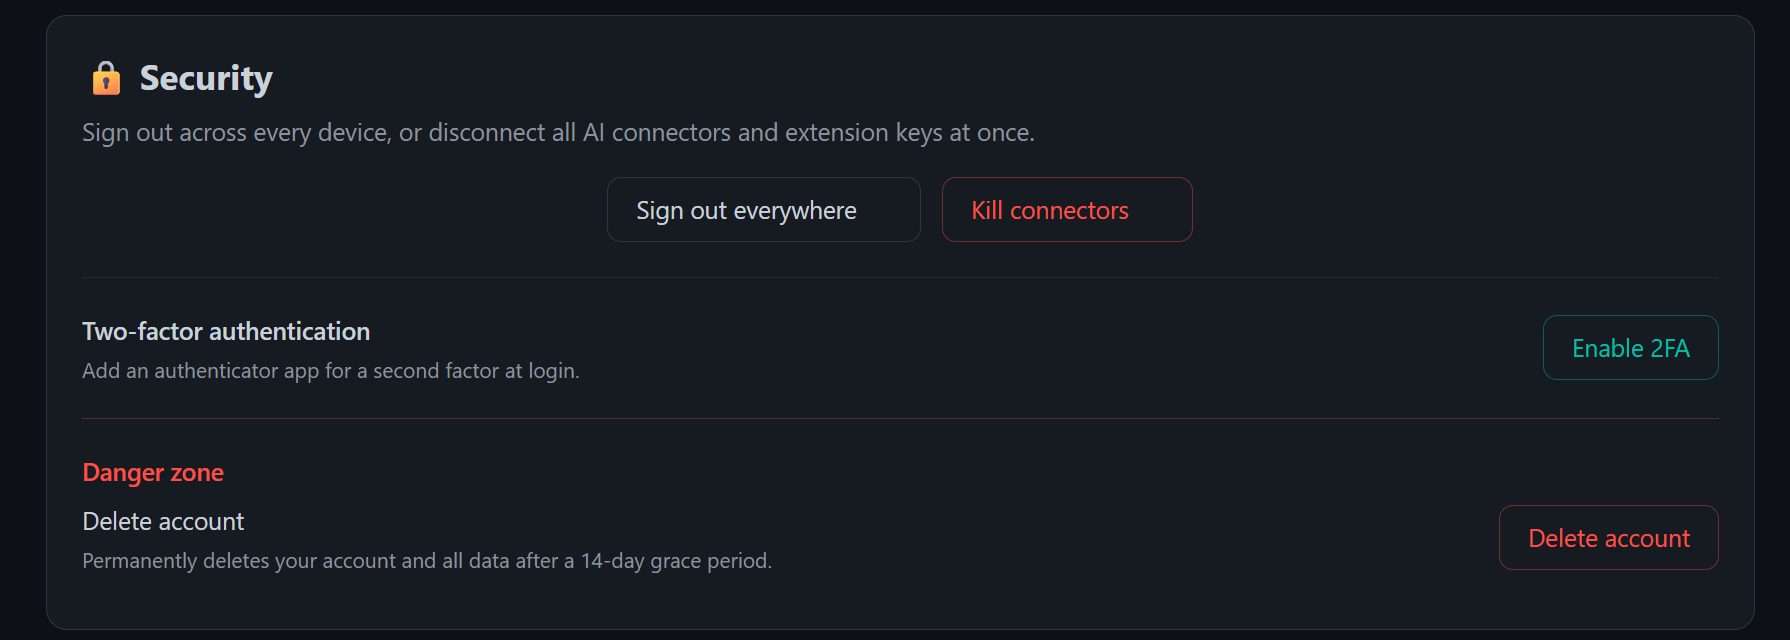
At the bottom of the Security card sits the Danger zone. Delete account permanently deletes your account and all data after a 14-day grace period. Deletion is deliberately a multi-step confirmation chain:
- Click Delete account, read the summary of what happens, type
DELETE(plus an authenticator code if 2FA is enabled), then click Send confirmation email. Nothing is deleted yet. - Open the confirmation link from your email (valid for 15 minutes) and confirm on the final page — with a fresh authenticator code if 2FA is enabled.
- Your account is frozen immediately: you are signed out everywhere, and all AI connectors, extension keys, and API keys are revoked on the spot. Permanent deletion is scheduled 14 days out.
During those 14 days, the cancellation link in the "deletion scheduled" email revives your account at any time — but revoked connectors and keys stay revoked for security; reconnect each AI manually after cancelling.
After the grace period there is no way back
Once the 14-day window passes, your account, memories, and keys are permanently and irreversibly deleted. Export your data first — Export JSON or Export Markdown from the dashboard — if you might need it later. Records we are legally required to keep (your Service Notice acceptance and security audit entries) are retained without your personal details.
Next steps
- Memory Categories — organize what you save.
- Privacy & Security — how your vault is protected.