MCP Connectors
Claude, ChatGPT, and Grok support PowerMemory natively through the open Model Context Protocol (MCP). One vault, one OAuth login per platform, your memories available wherever you work.
Your MCP endpoint:
https://powermemory.ai/mcp/mcp
Authentication happens through OAuth — you sign in once per platform, and your vault stays scoped to your account.
Which path is right for you?
MCP is the native route for Claude, ChatGPT, and Grok. For Gemini, Copilot, and Perplexity, use the Chrome Extension instead — those platforms don't yet support MCP.
Before you start
- A PowerMemory account (create one free).
- The platform you want to connect (Claude, ChatGPT Plus, or Grok).
- The MCP URL above.
Claude
Claude supports custom MCP connectors directly in settings.
- Open Customize → Connectors.
- Click + Add to open the "Add custom connector" dialog.
- Enter the details:
- Name:
Power Memory - URL:
https://powermemory.ai/mcp/mcp - Click Add.
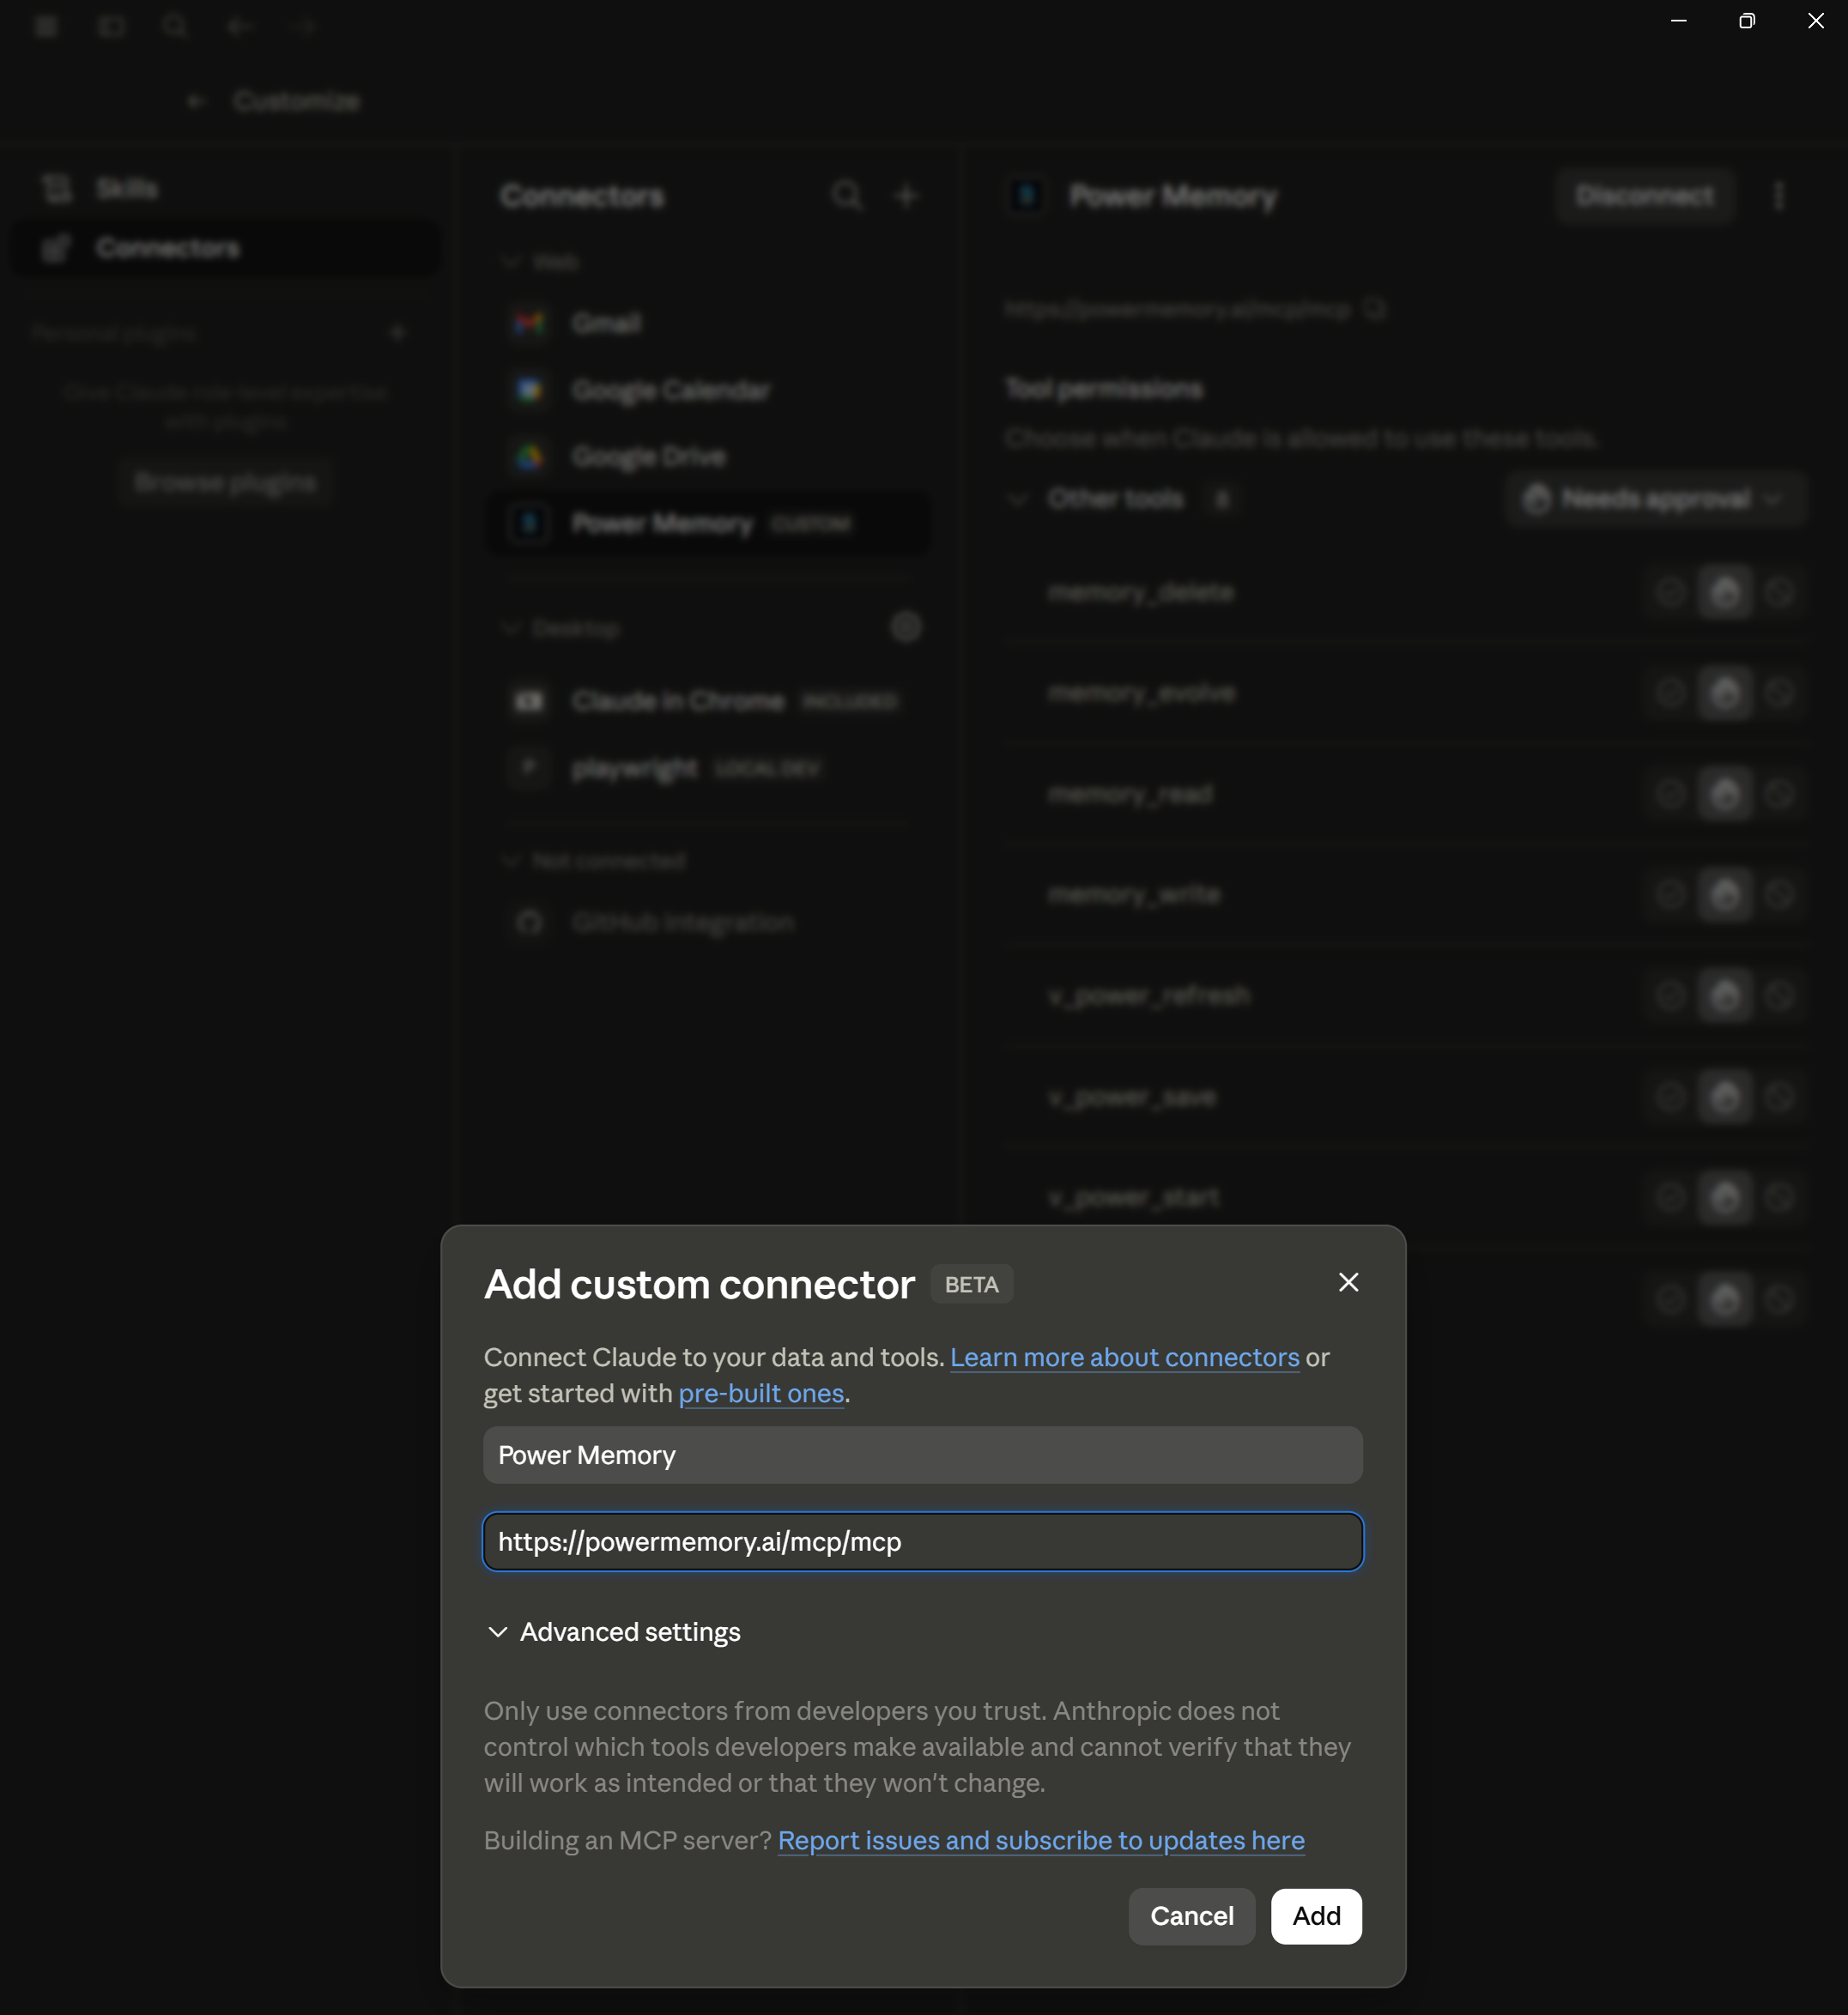
- When prompted, sign in through OAuth to link your vault.
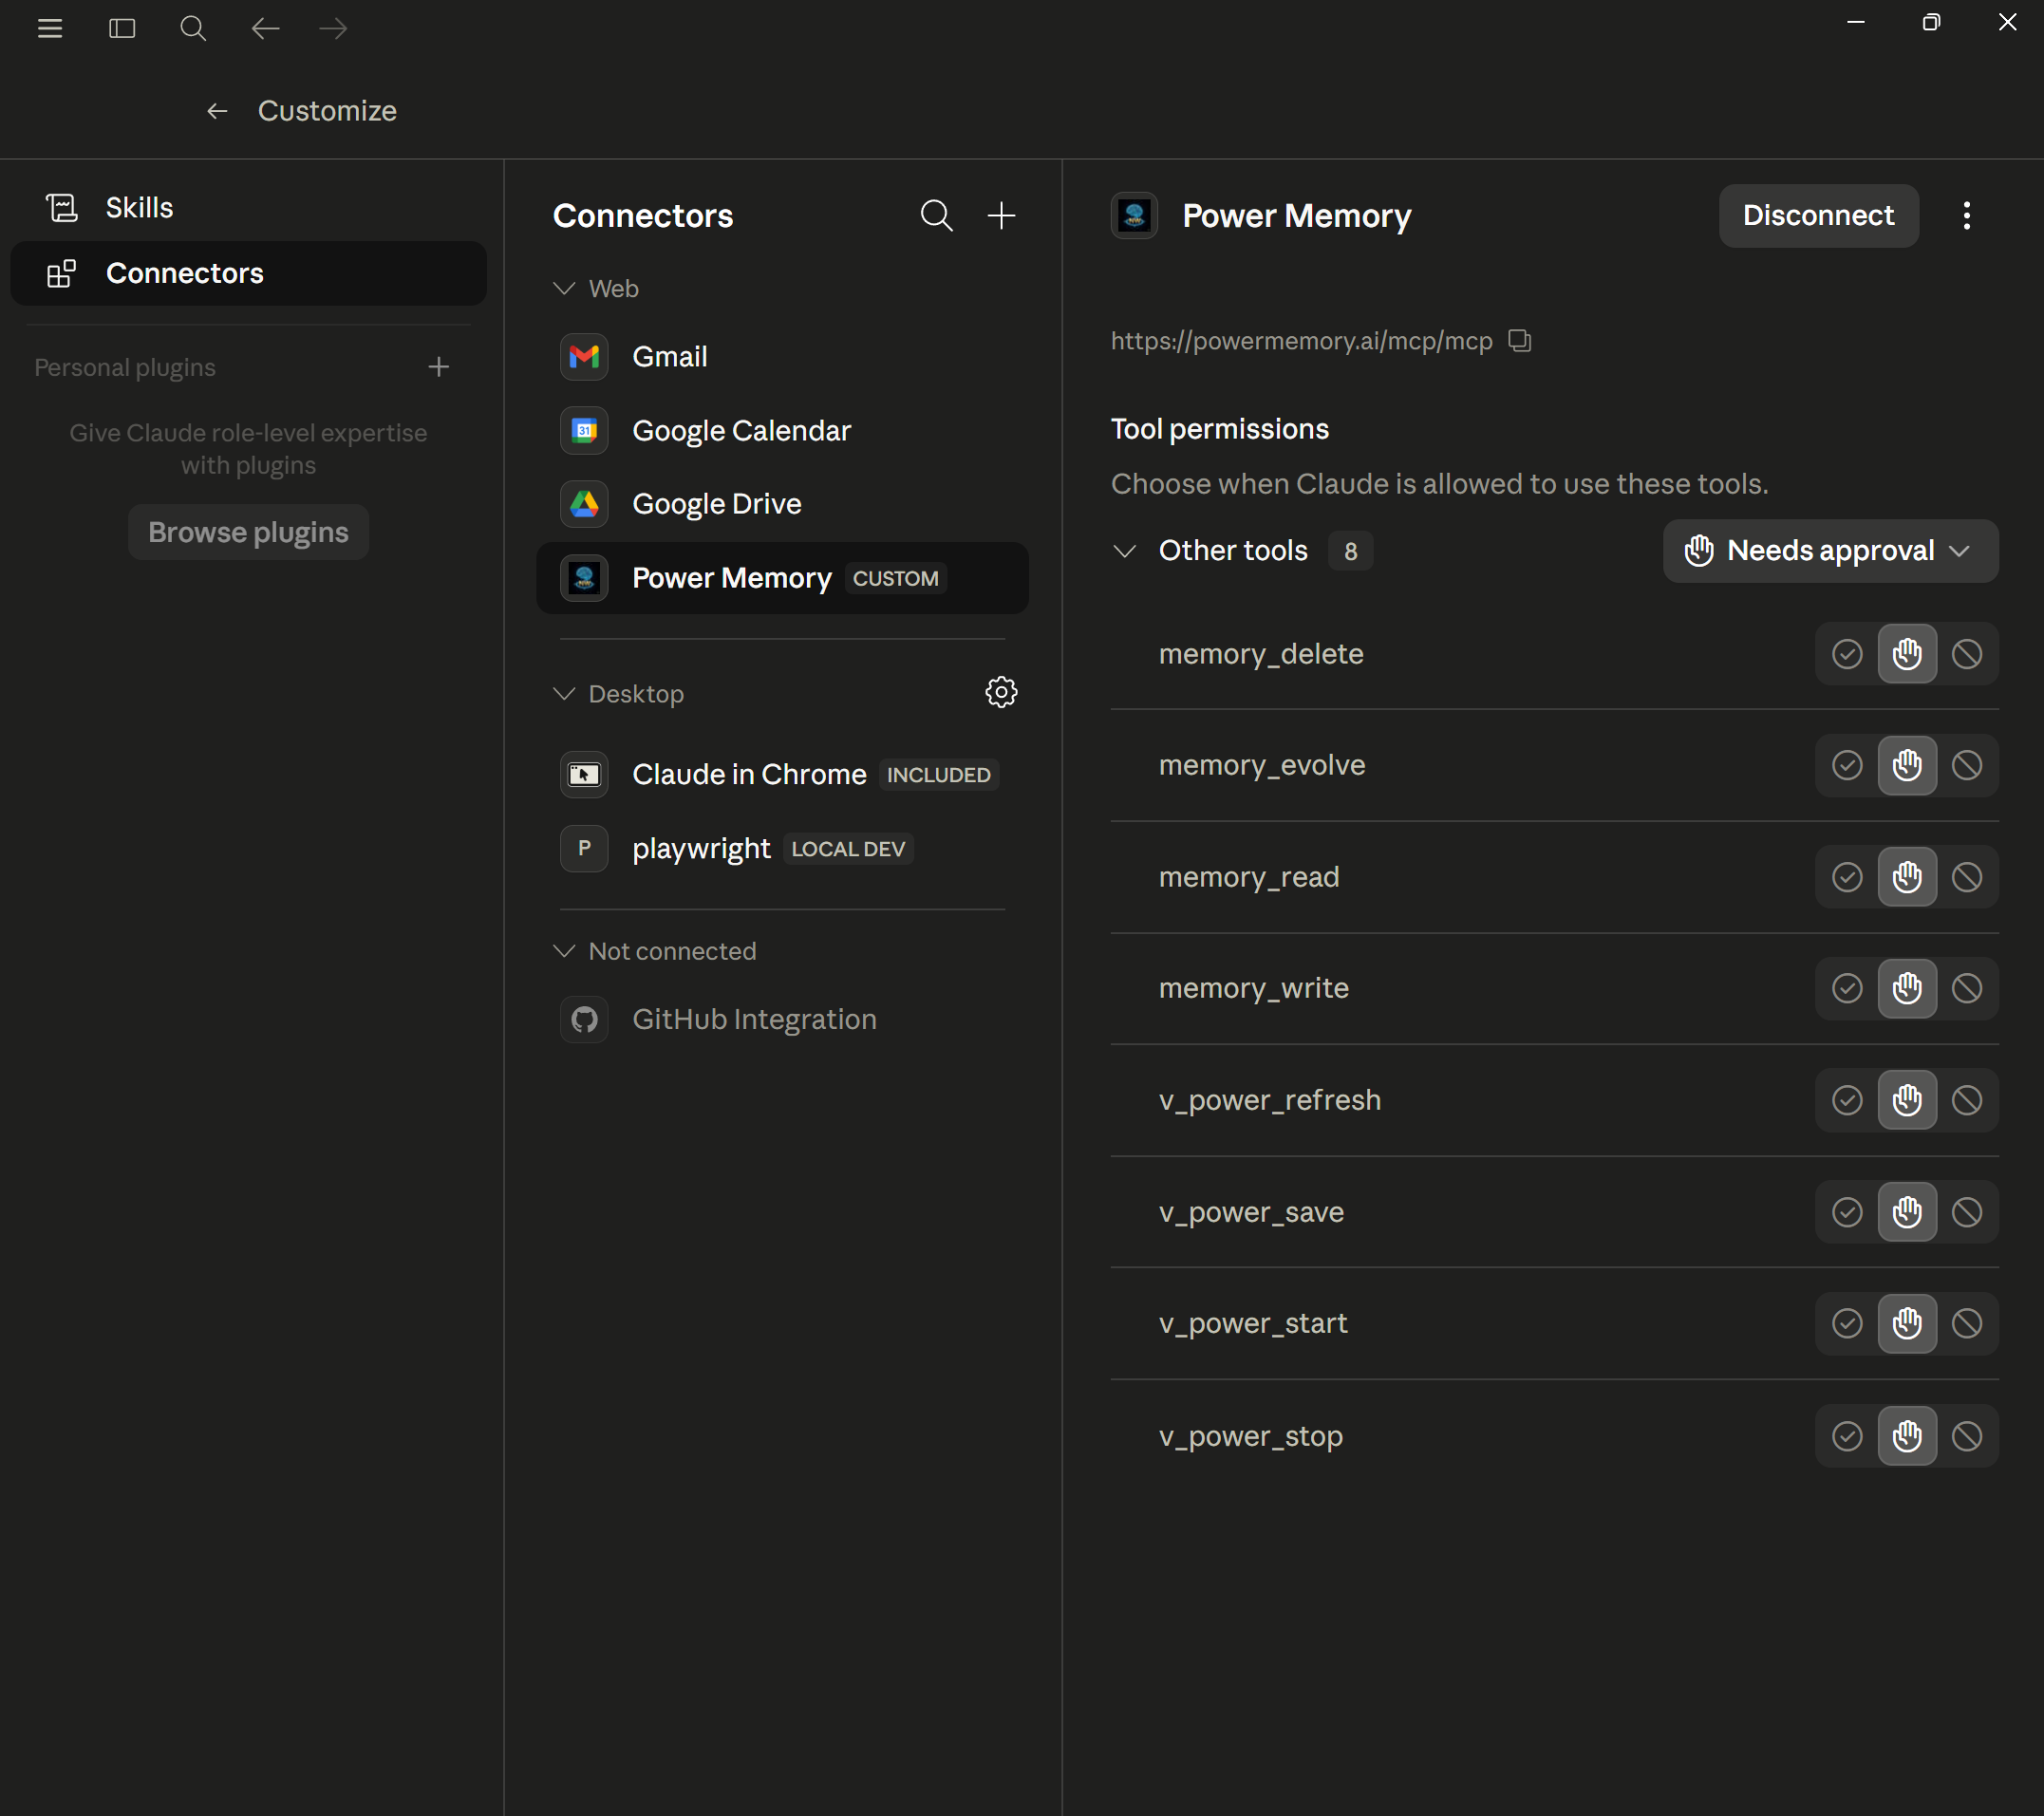
- Power Memory now appears connected. You can review tool permissions — the 8 tools default to "Needs approval", so Claude asks before each use.
ChatGPT
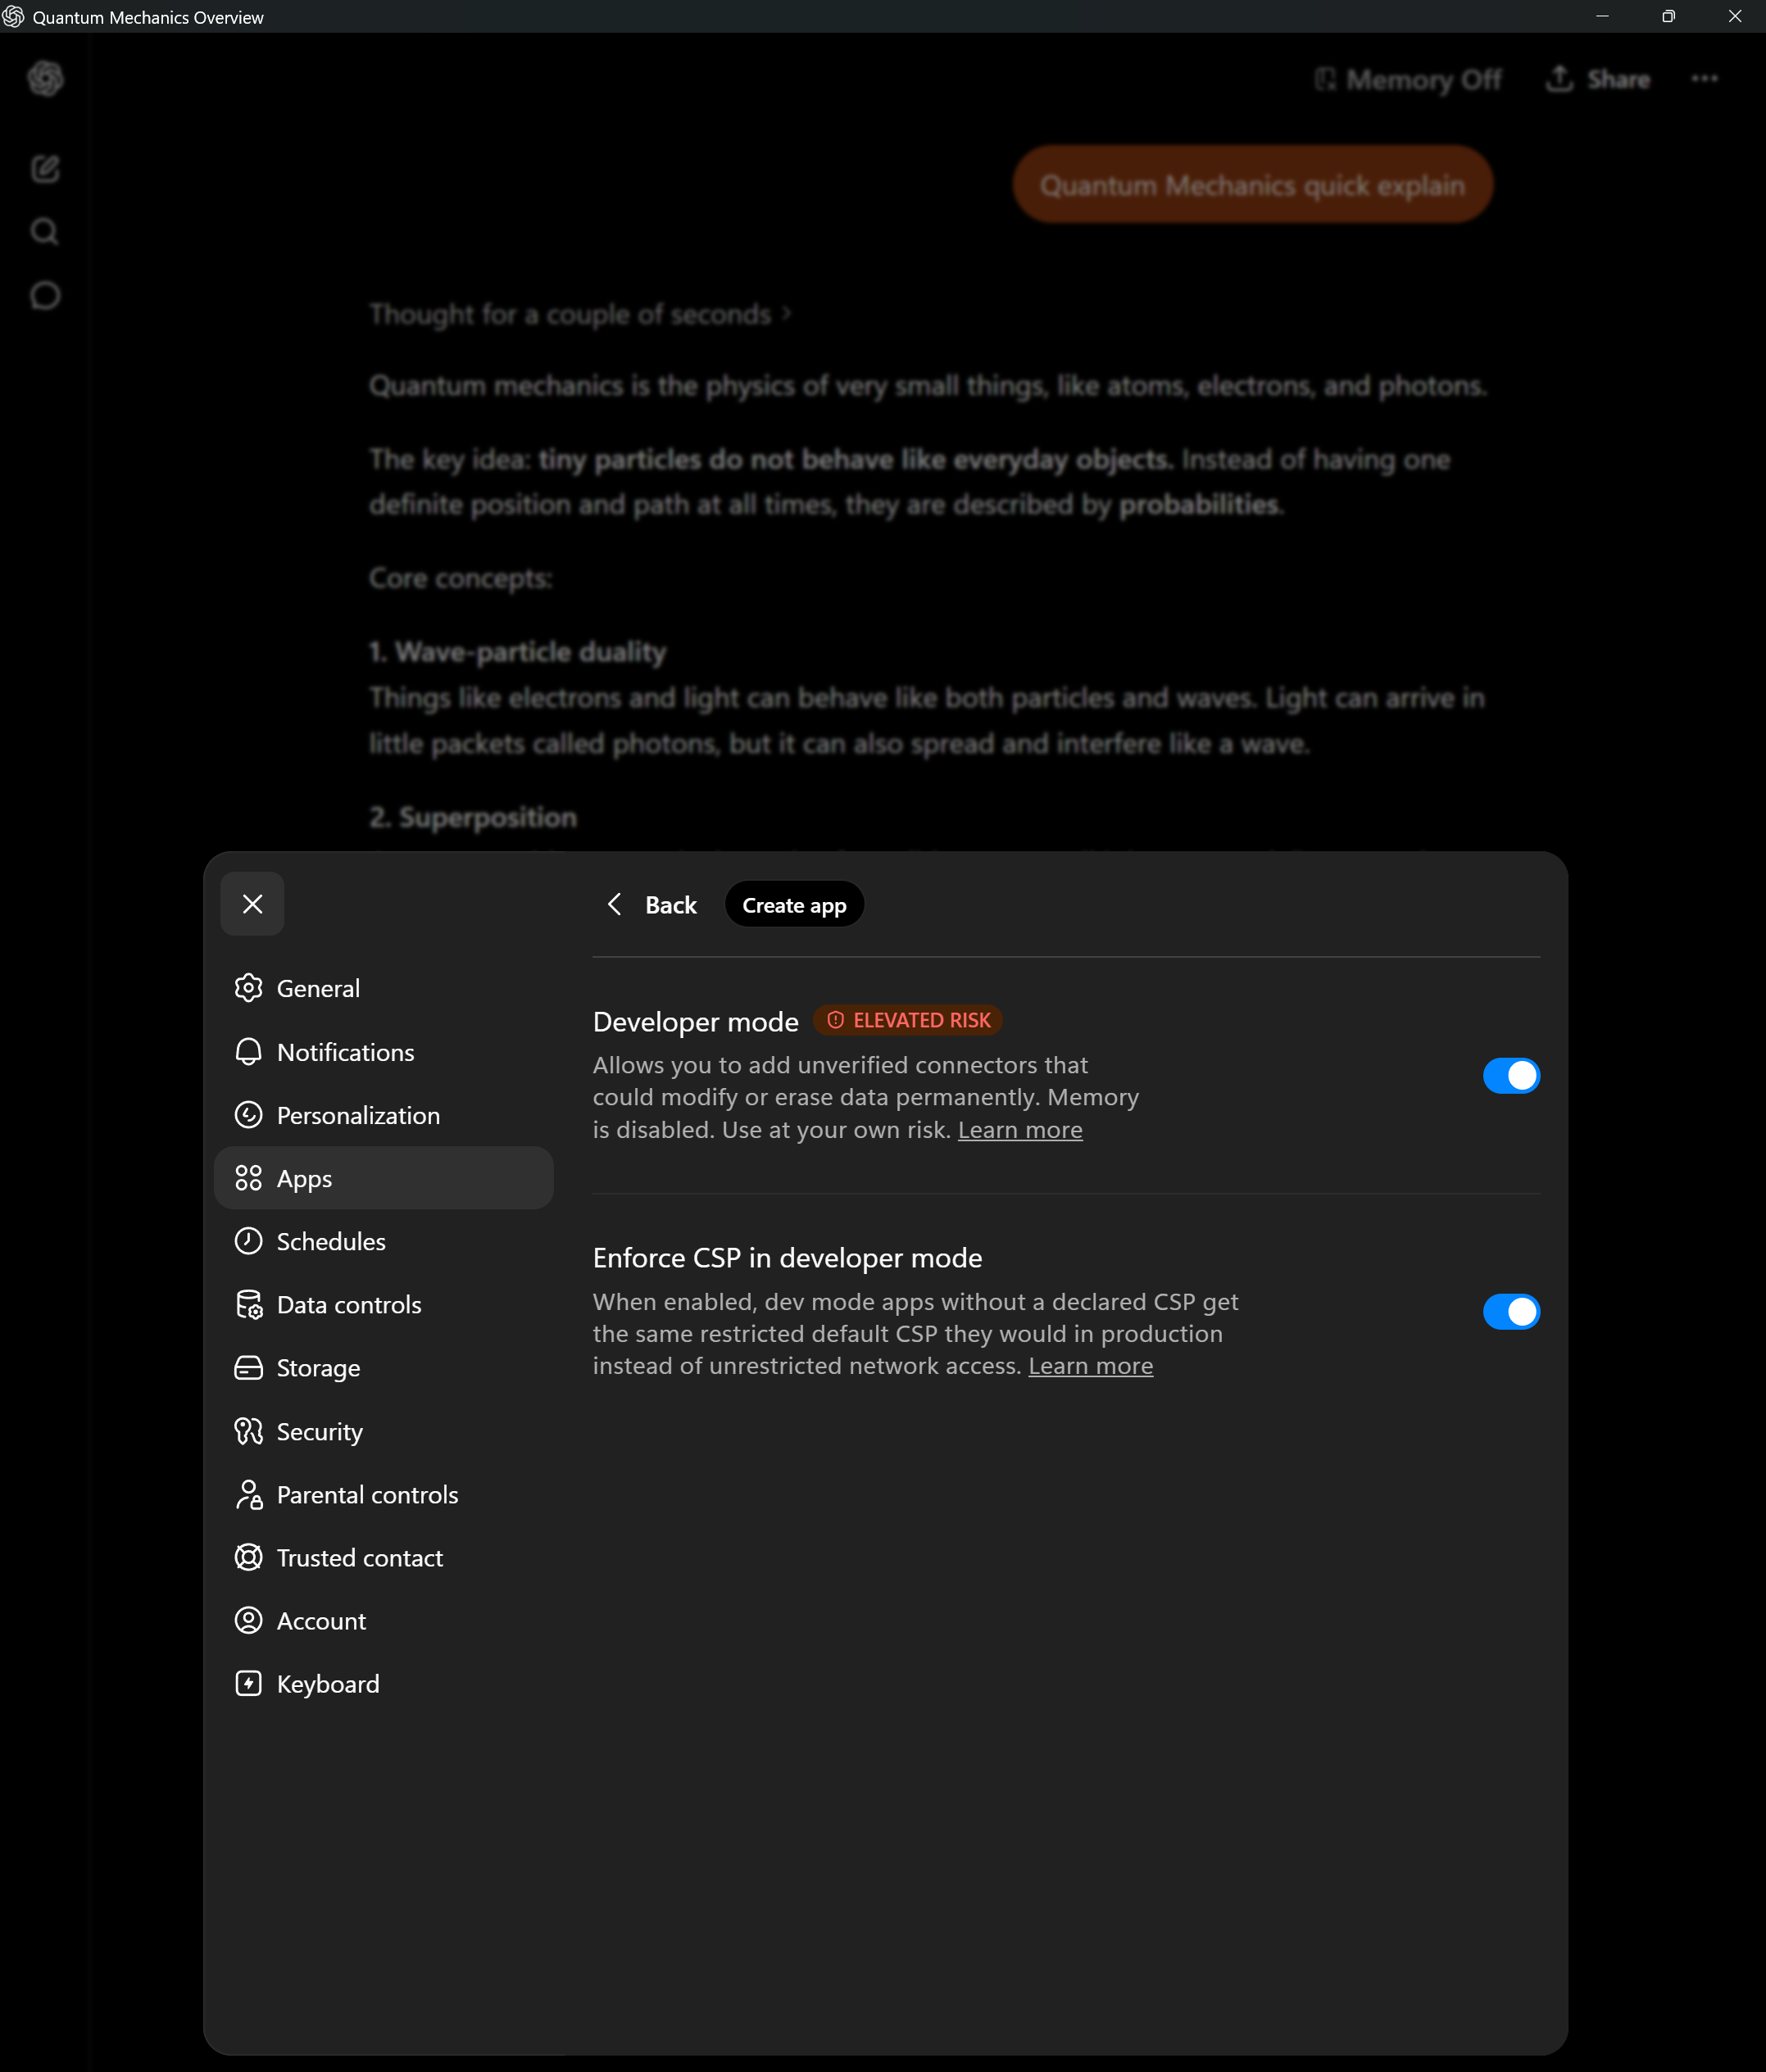
ChatGPT requires Plus and Developer Mode to add custom MCP connectors.
- Open Settings → Apps and toggle Developer mode ON. ChatGPT shows an "elevated risk" notice — this is standard for any custom MCP connector.
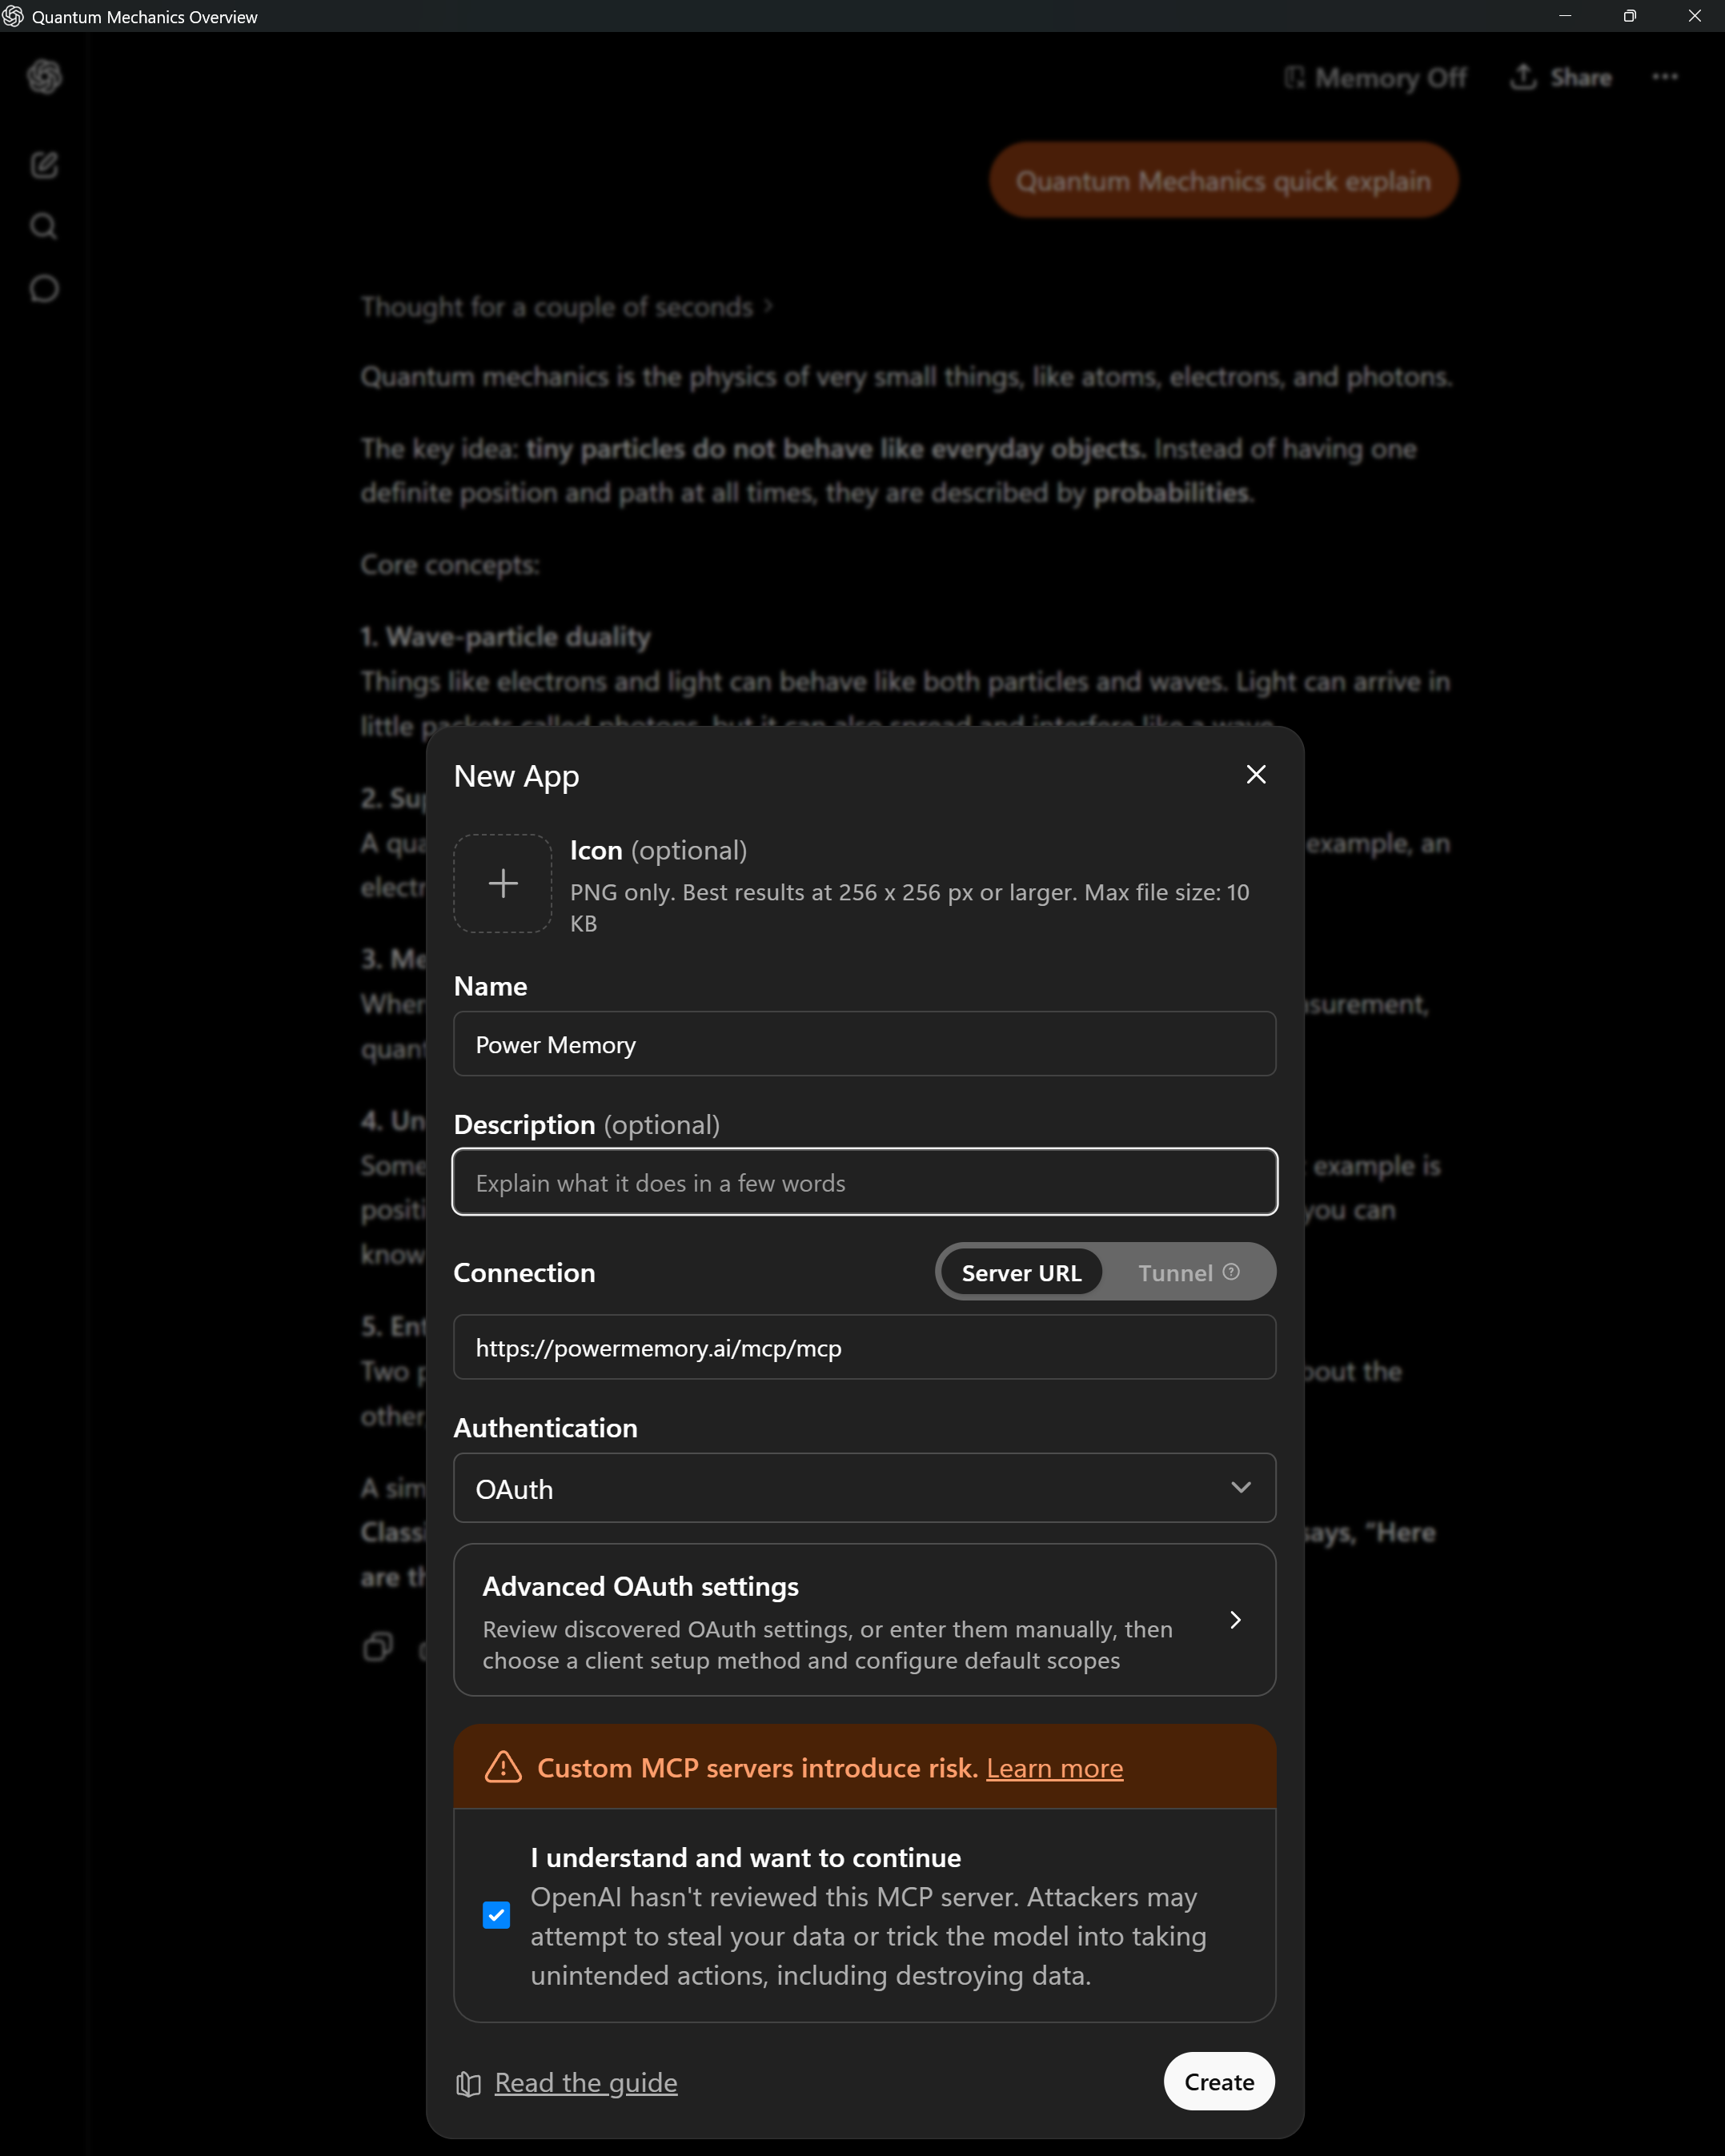
- Still under Settings → Apps, click Create app.
- In the New App dialog, enter:
- Name:
Power Memory - Server URL:
https://powermemory.ai/mcp/mcp - Authentication:
OAuth - Tick "I understand and want to continue" to acknowledge that OpenAI hasn't reviewed third-party MCP servers.
- Click Create.
- Sign in through OAuth when prompted. Power Memory now appears under Enabled apps (and in Drafts, marked
DEV).

Why the 'DEV' label?
Custom MCP connectors added through Developer Mode are marked as developer apps. This is expected — it doesn't affect functionality.
Grok
Grok supports custom connectors directly.
- On the Connectors page, click New Connector (top right).
- In the "Custom Connector" dialog, enter:
- Name:
Power Memory - Server URL:
https://powermemory.ai/mcp/mcp - Click Add Connector.
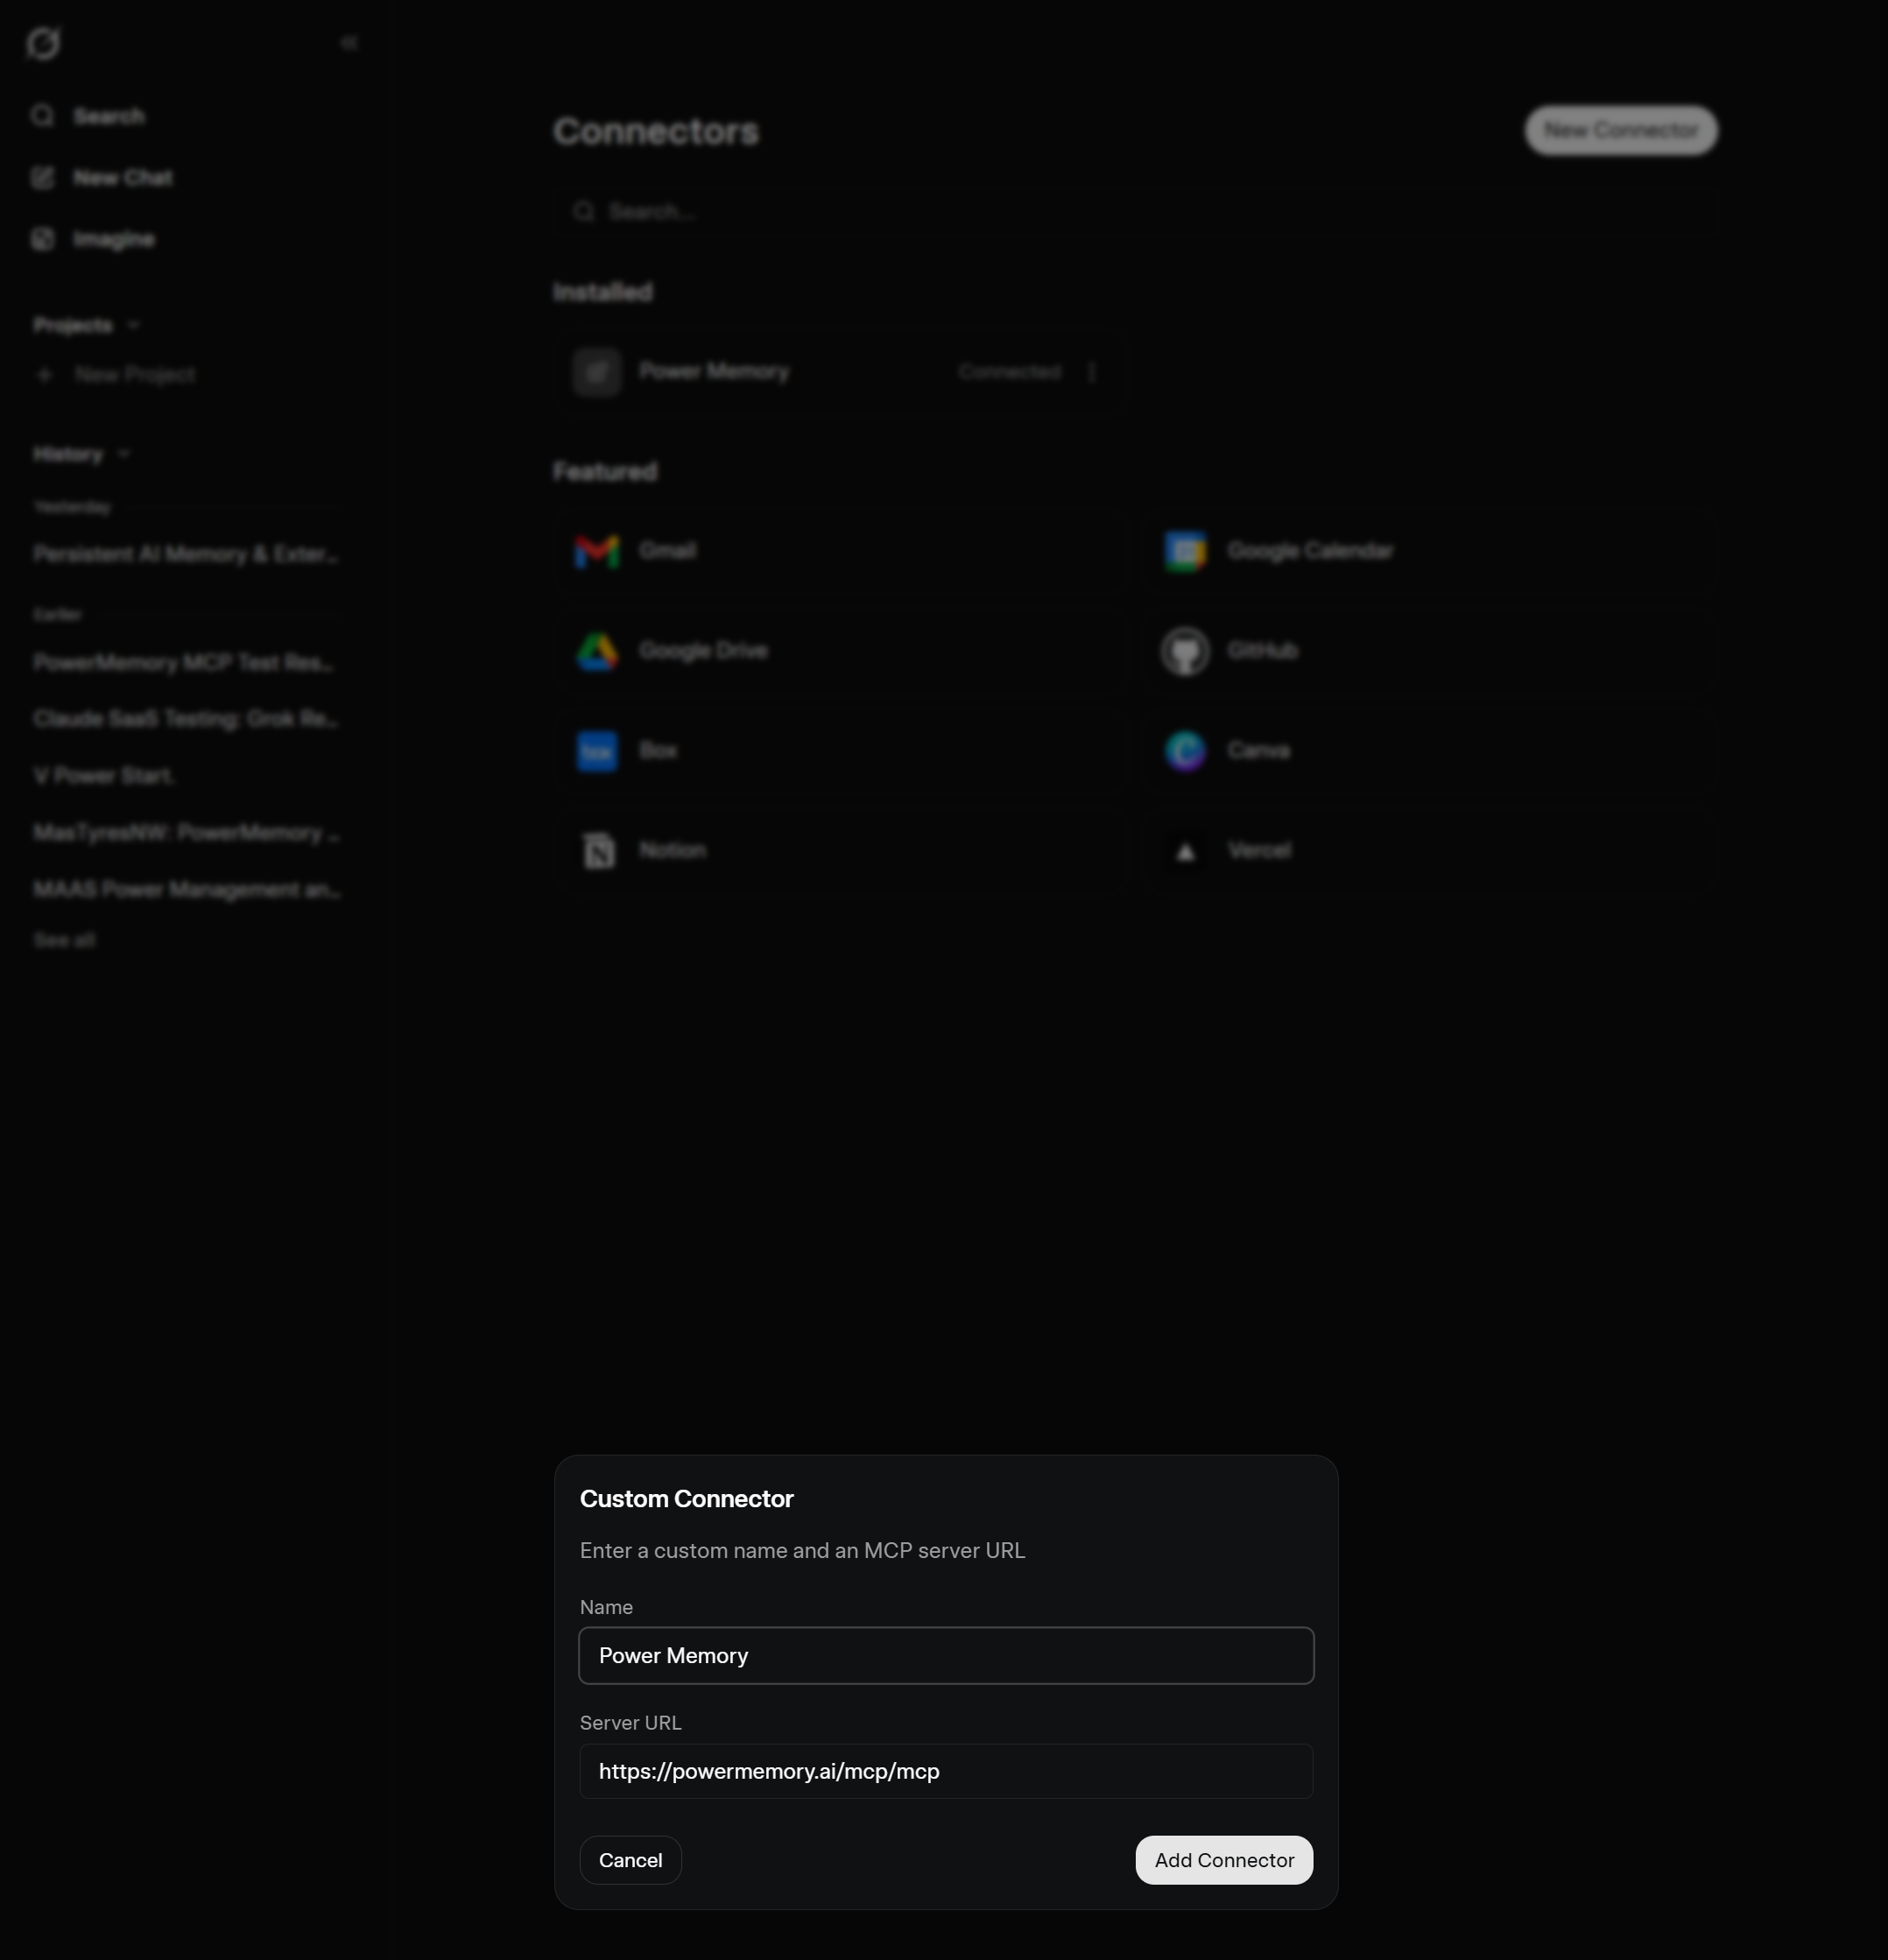
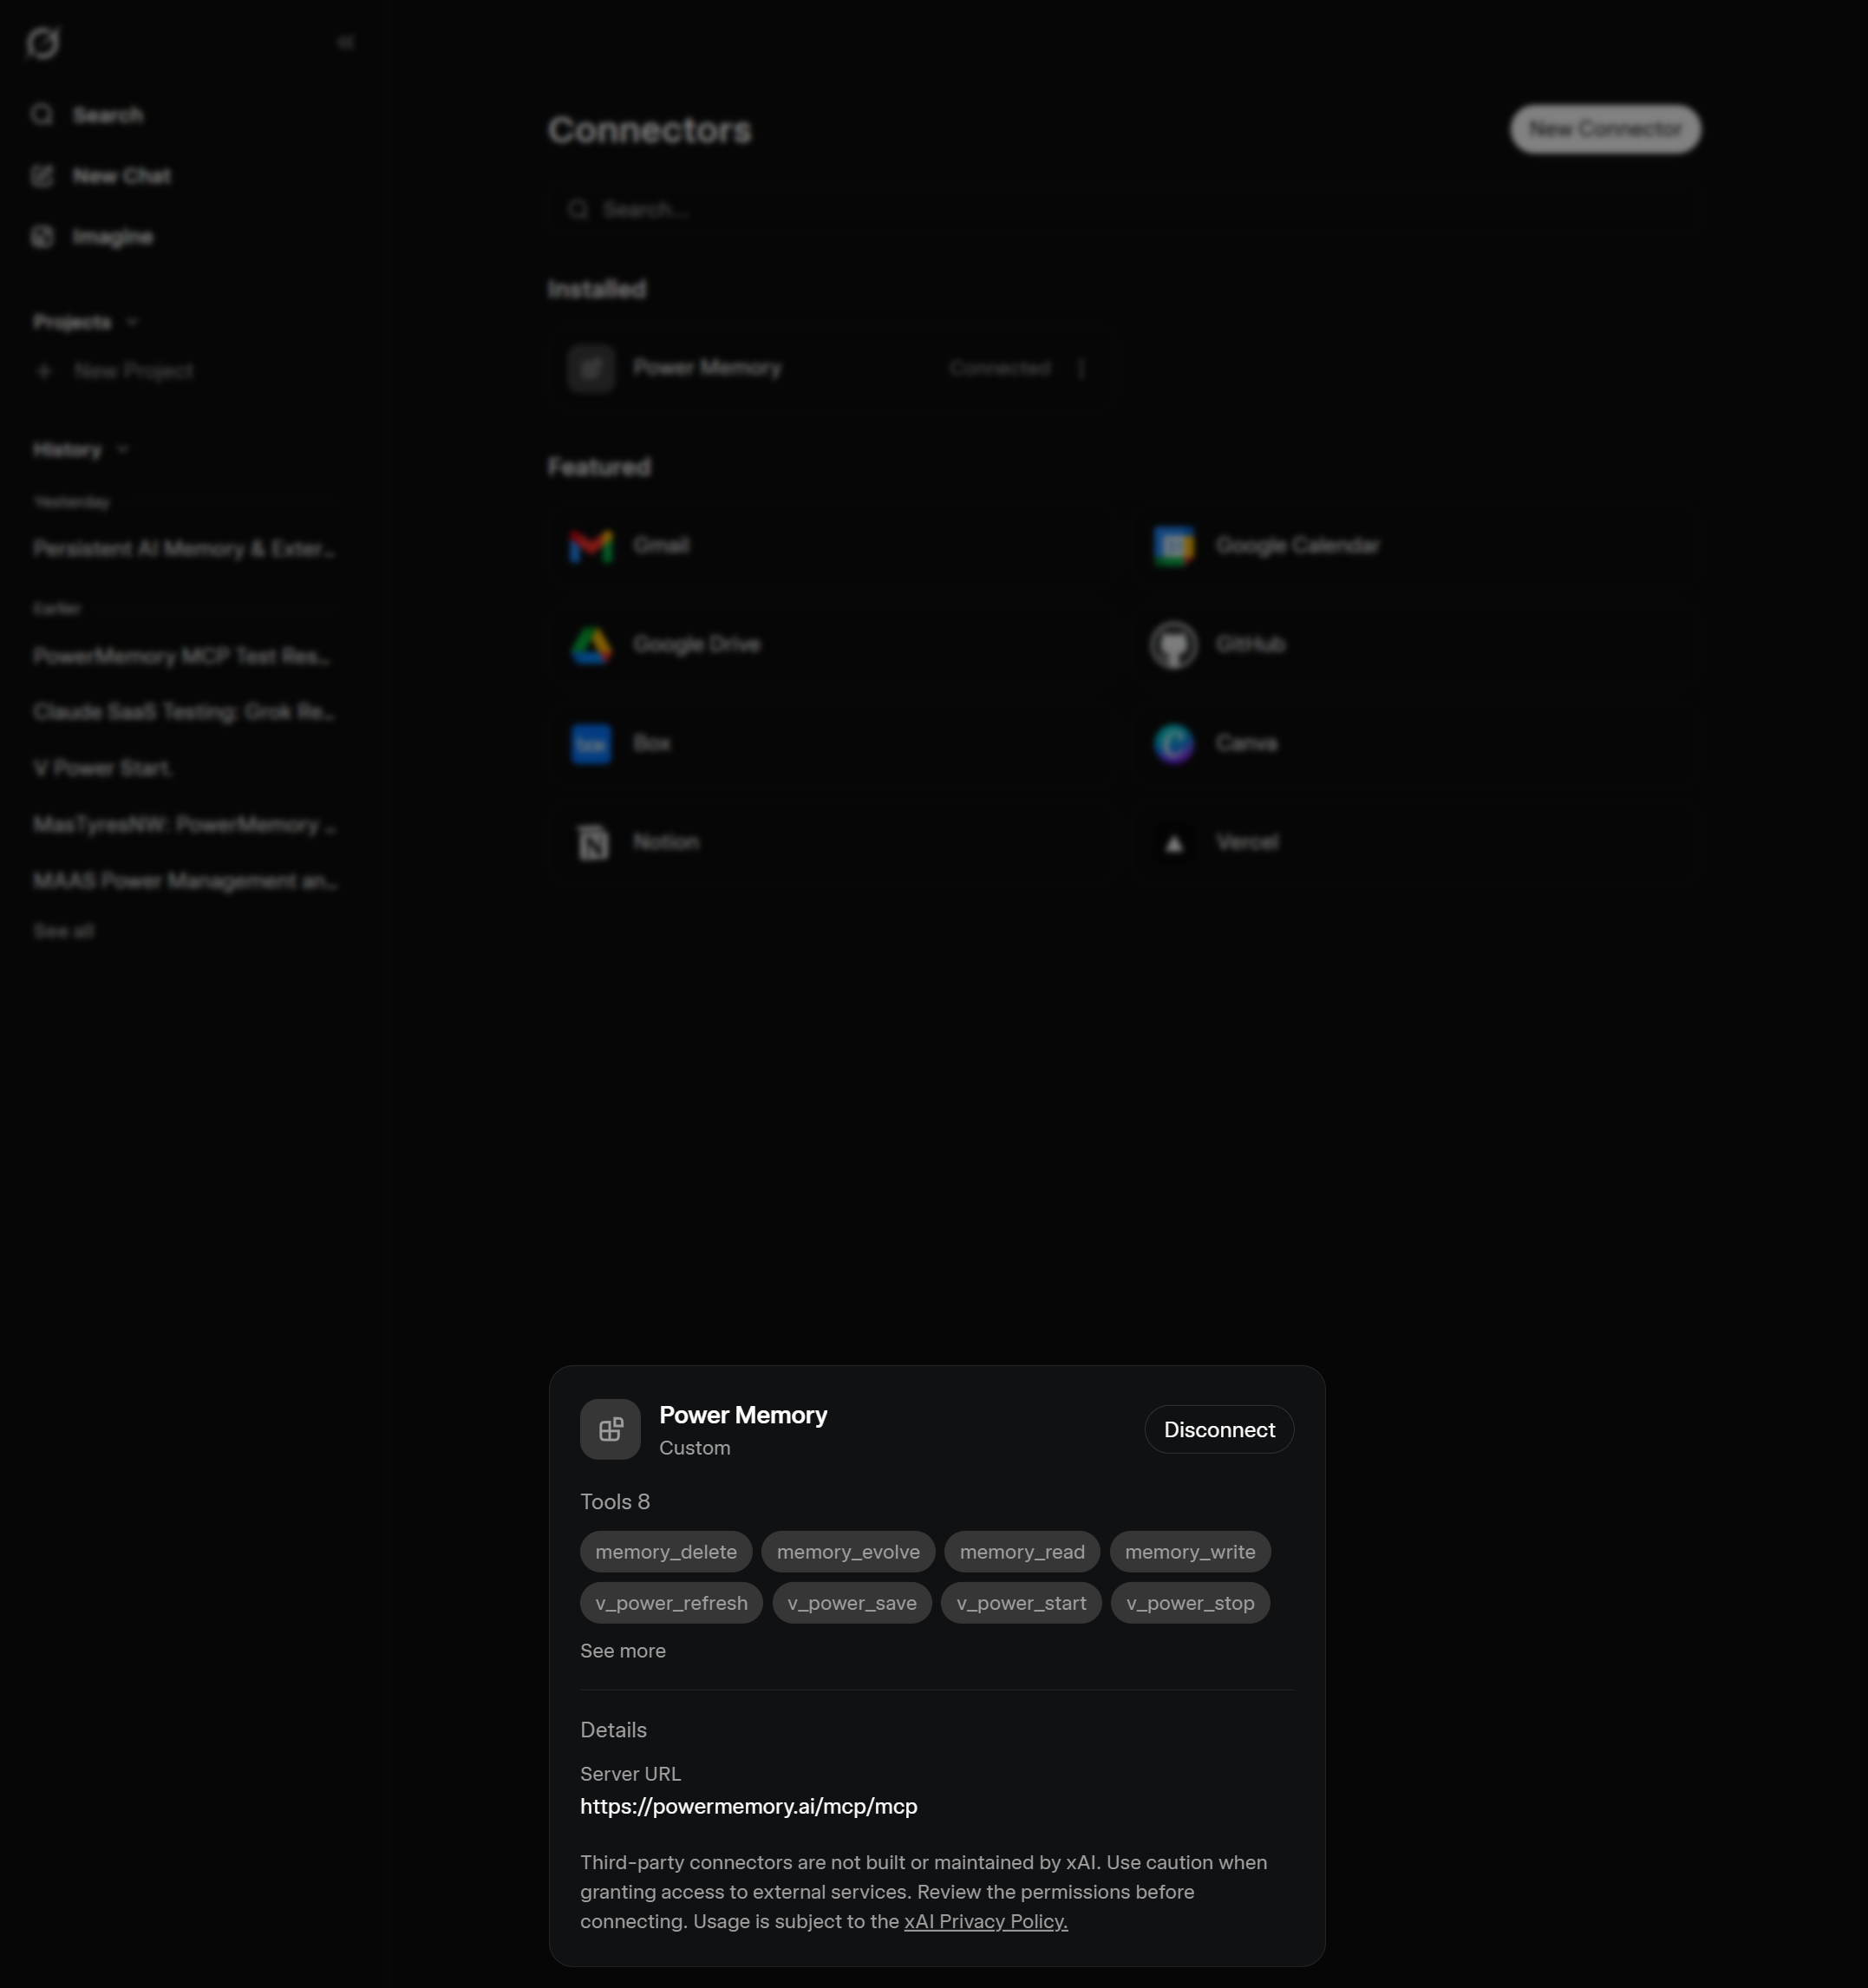
- Sign in through OAuth when prompted. Power Memory now shows as Connected with its 8 tools available.
Note
Third-party connectors aren't built or maintained by xAI and are subject to the xAI Privacy Policy — standard for any custom connector.
What you get — the 8 tools
Once connected, your AI has access to these PowerMemory tools:
| Memory operations | Session flow (V POWER) |
|---|---|
memory_read — recall context |
v_power_start — begin a session |
memory_write — save new memory |
v_power_save — capture session memories |
memory_evolve — update existing |
v_power_refresh — re-anchor mid-session |
memory_delete — remove memory |
v_power_stop — close and archive |
See the Extension Guide for how the V POWER session flow works in practice, and Memory Categories for what's worth saving.
Trouble connecting?
If OAuth doesn't open, the connector won't link, or tools don't appear, see Troubleshooting.